Section 1
Before you start
The Te Puna Mahara website runs on the Central Otago District Council website platform. Your login only gives you the Te Puna Mahara part of it — you can't accidentally change centralotagonz.com or the main Council site.
Two systems, one website
Almost everything you'll ever edit lives in the website CMS. Events are the exception — they live in Dottie, the district's listings system, and flow onto the site automatically.
Website CMS
Pages, photos, spaces, venue hire, news, footer details. Sections 2–10.
Dottie
What's On events — the home page slider and the What's On page. Section 11.
CODC bookings
Every "Book a space" button links out to the Council booking system. The website never takes a booking itself.
Logging in
- Go to the website address with
/adminon the end. - Enter your email and password. Forgotten it? Use I've lost my password — don't create a second account.
- Check the site selector under your name says Te Puna Mahara. If it says anything else, switch it before you edit.
Until the new site goes live, editing happens on the Catalyst test site (tpm.codc-conz-uat.catalystone.staging-covecloud.nz/admin) — every screenshot here comes from there. Once it launches, the same CMS sits at the live address. Your CODC website contact will confirm which one to use.
Section 2
A tour of the CMS
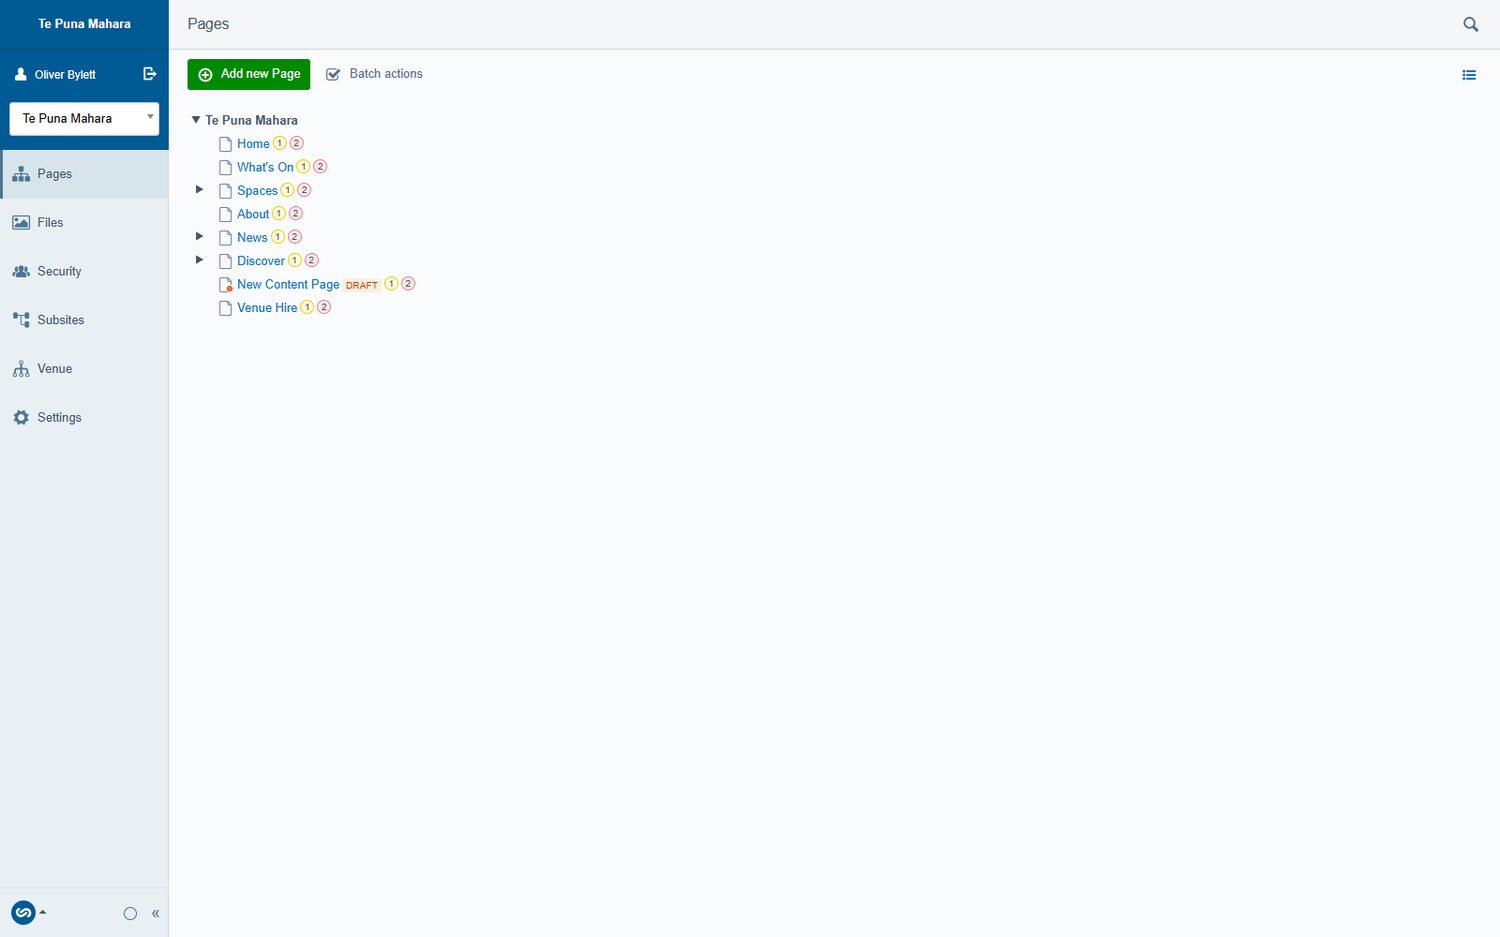
The dark strip down the left is the whole system. You'll live in Pages and Files.
| Menu item | What it's for |
|---|---|
| Pages | Every page on the site. Add, edit, reorder, publish. |
| Files | Photos, PDFs and video, in folders. Venue photography lives in tpm-venue. |
| Security | CMS users and permissions. Council and Catalyst manage this. |
| Subsites | Switching between Council websites. Leave it alone. |
| Venue | Team member profiles — name, role, photo, bio. |
| Settings | Site-wide details: address, phone, email, footer, alert banner, social links. |
Section 3
Pages & the site map
Pages sit in a tree, and the top level of that tree is the main menu. Child pages become dropdown items — that's why Cinema and Café AWA sit under Discover.
| Page | Type | What it does |
|---|---|---|
| Home | Content Page | Built from around 19 blocks. The What's On slider pulls live from Dottie. |
| What's On | Dottie List Page | Lists events automatically. You don't add events here — see section 11. |
| Spaces | Space Holder | Parent of the space pages; the grid fills itself. |
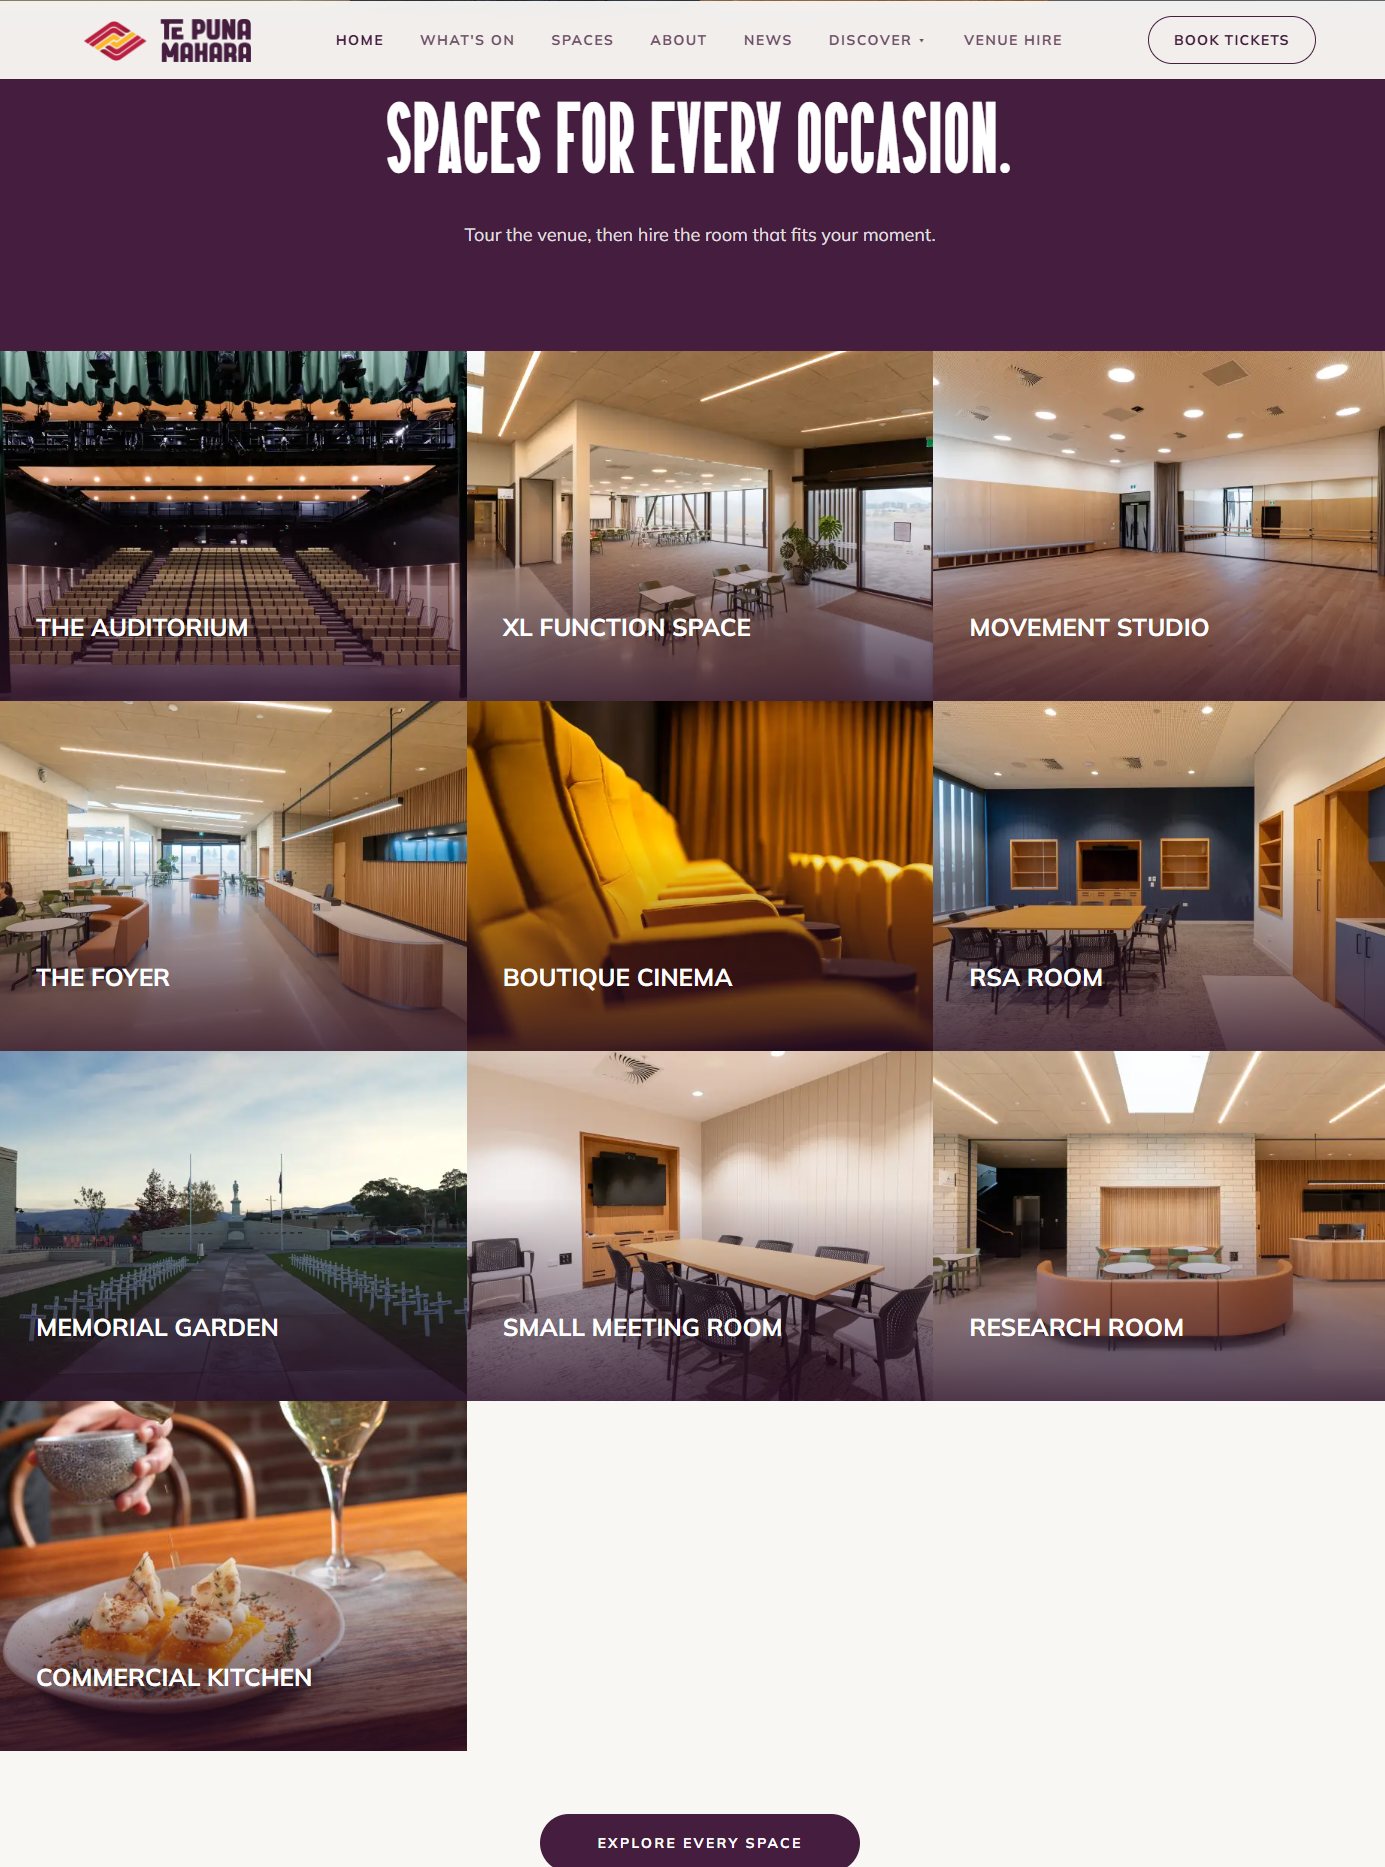
| Space pages | Space Page | Auditorium, XL Function Space, Movement Studio, Foyer, Boutique Cinema, RSA Room, Memorial Garden, Small Meeting Room, Research Room, Commercial Kitchen. |
| About | Content Page | The story, the purpose, the name. |
| News | News Holder | Parent of all articles; newest first. |
| Discover | Content Page | Index page. Children: The Junction, Gallery, Cinema, Café AWA. |
| Venue Hire | Content Page | Rates, inclusions, the hire guide PDF, booking call-to-action. |
Adding a new page
- In Pages, click the page the new one should sit under (or nothing, for a top-level page), then Add new Page.
- Choose where it goes, then choose the page type — for a normal page that's Content Page.
- Give it a page name and click Publish straight away, while it's still empty.
- Now add your blocks, and publish again when you're happy.
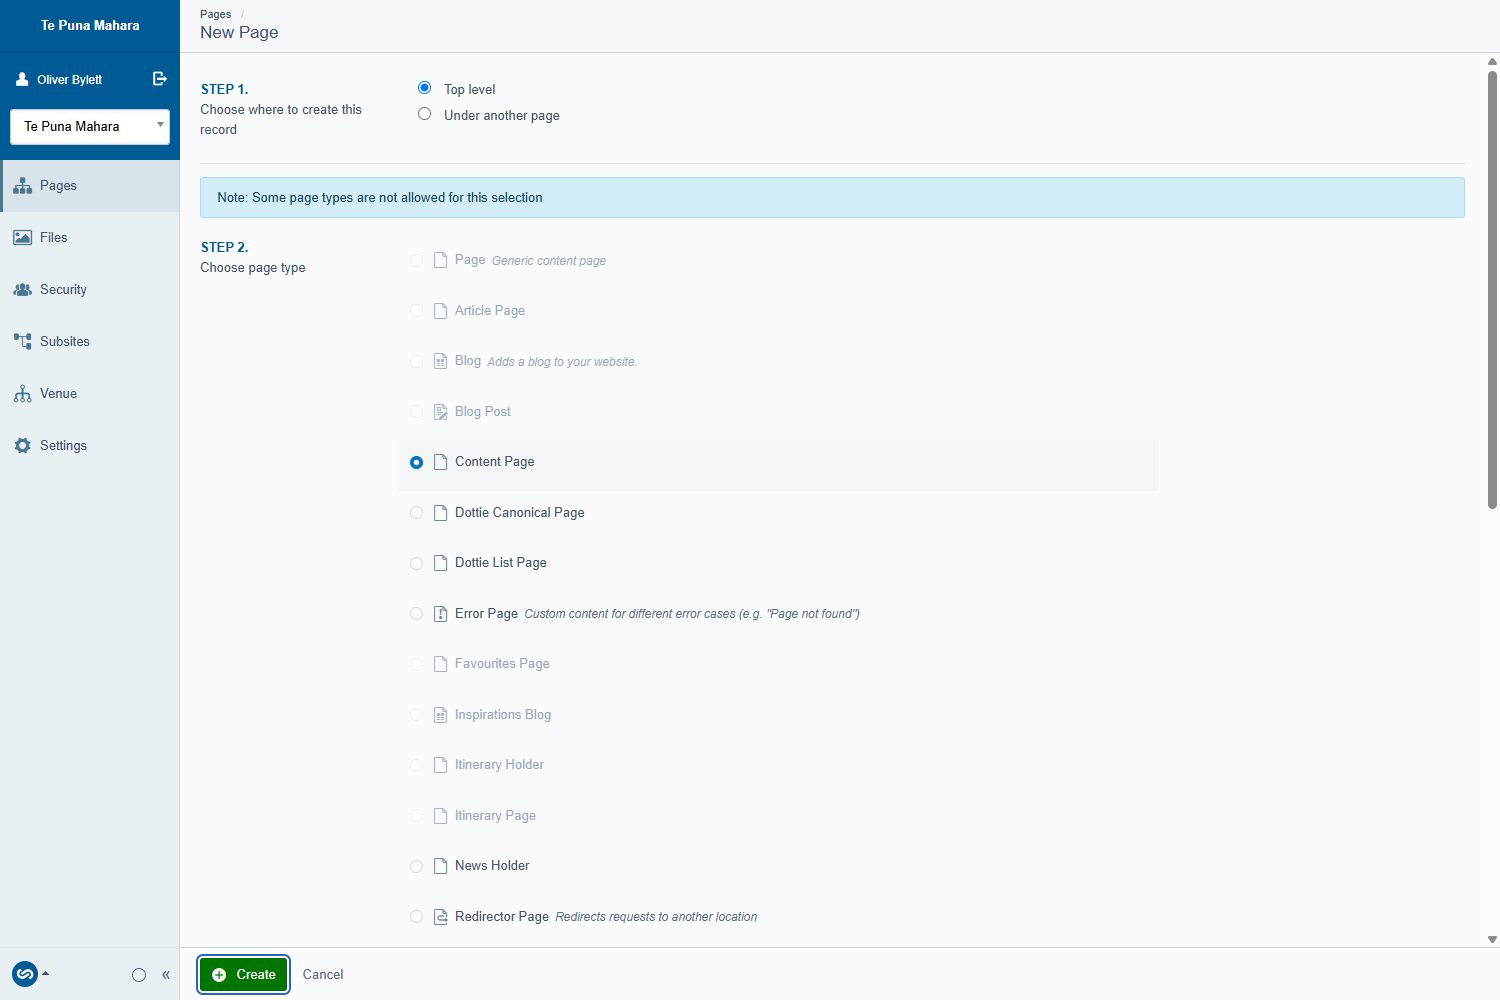
A brand-new page behaves oddly in the editor until it has been published once. Publish the empty page, then build it. Five seconds, a lot of confusion saved.
Page name, URL and menu label
- Page name — the heading, and the default menu label.
- URL segment — the web address. Once a page is live and people are linking to it, leave this alone.
- Navigation label — use this when the menu needs something shorter than the page name.
Hiding a page from the menu
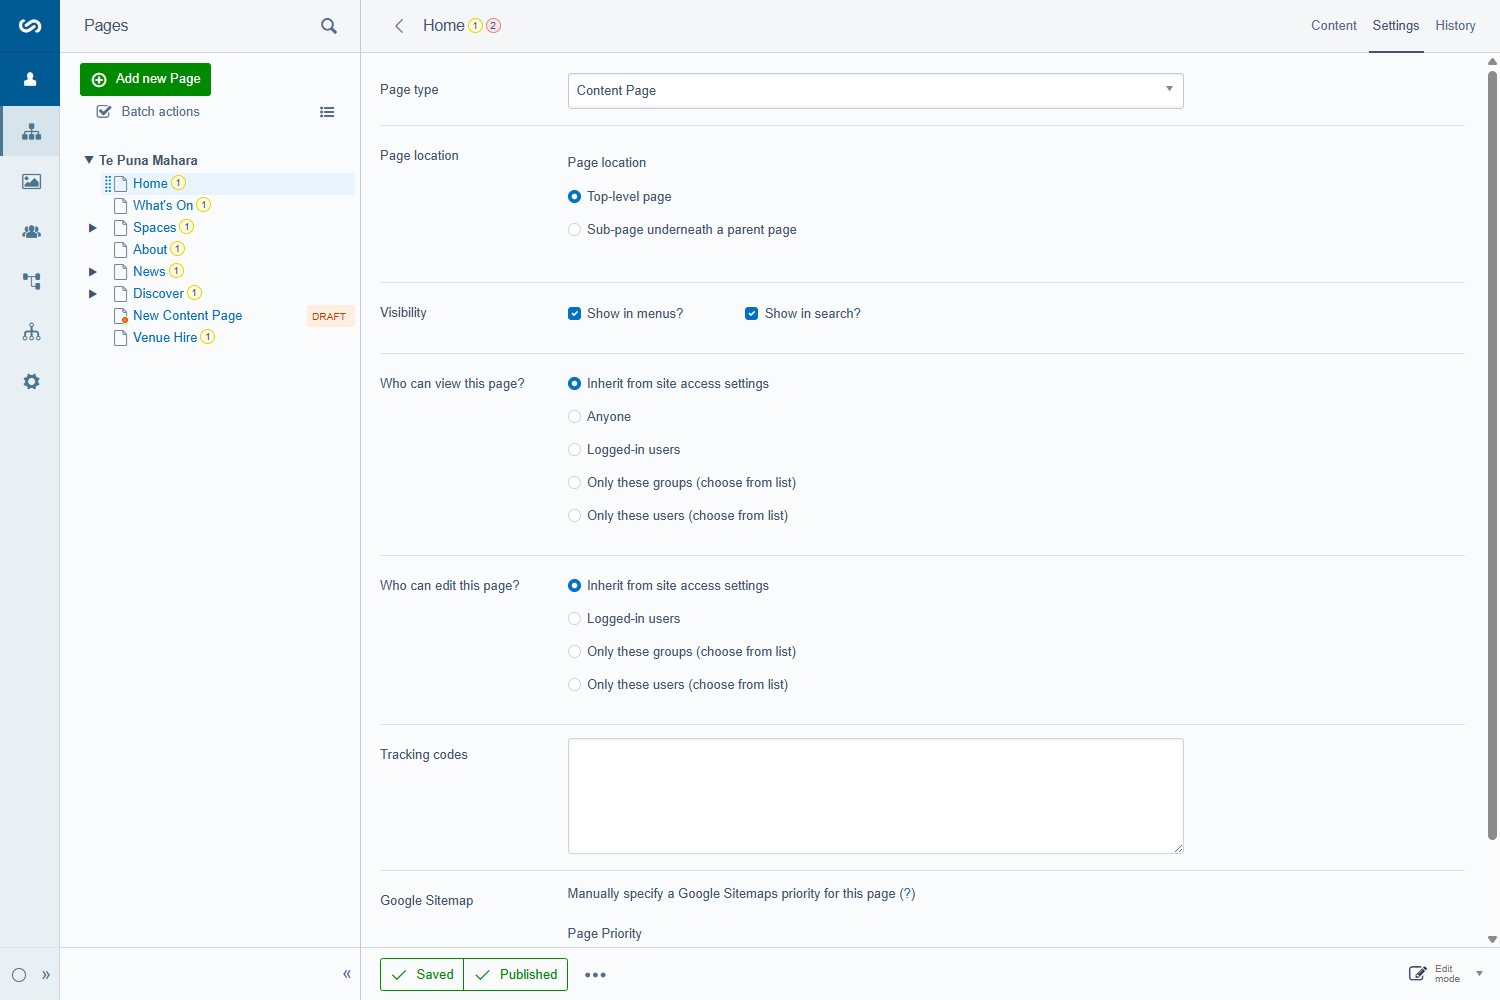
Open the page, go to the Settings tab and untick Show in menus. The page still works if you link to it directly — handy for thank-you pages and one-off forms.
Section 4
How blocks work
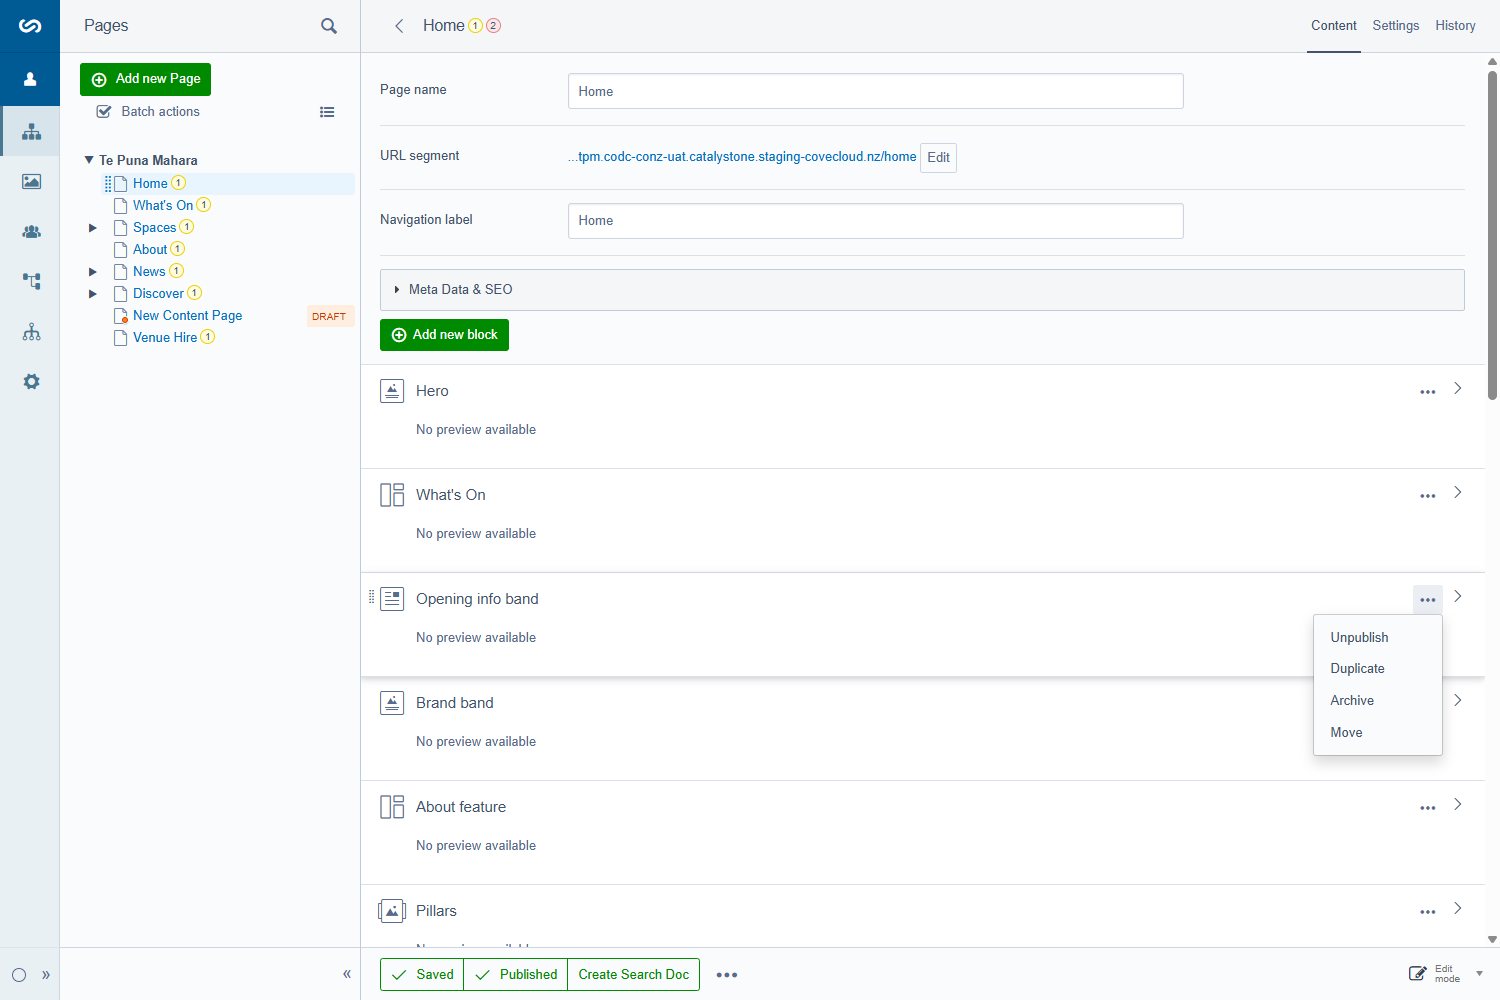
Every page is a stack of blocks. A block is one band of the page — a hero, a paragraph, a photo beside text, a grid of cards. You add blocks, fill them in, drag them into order, and publish.
Adding a block
- Click Add new block.
- Pick a type from the picker, or type in the search box.
- The new block appears at the top of the stack. Fill it in, then drag it into place with the dotted handle on its left edge.
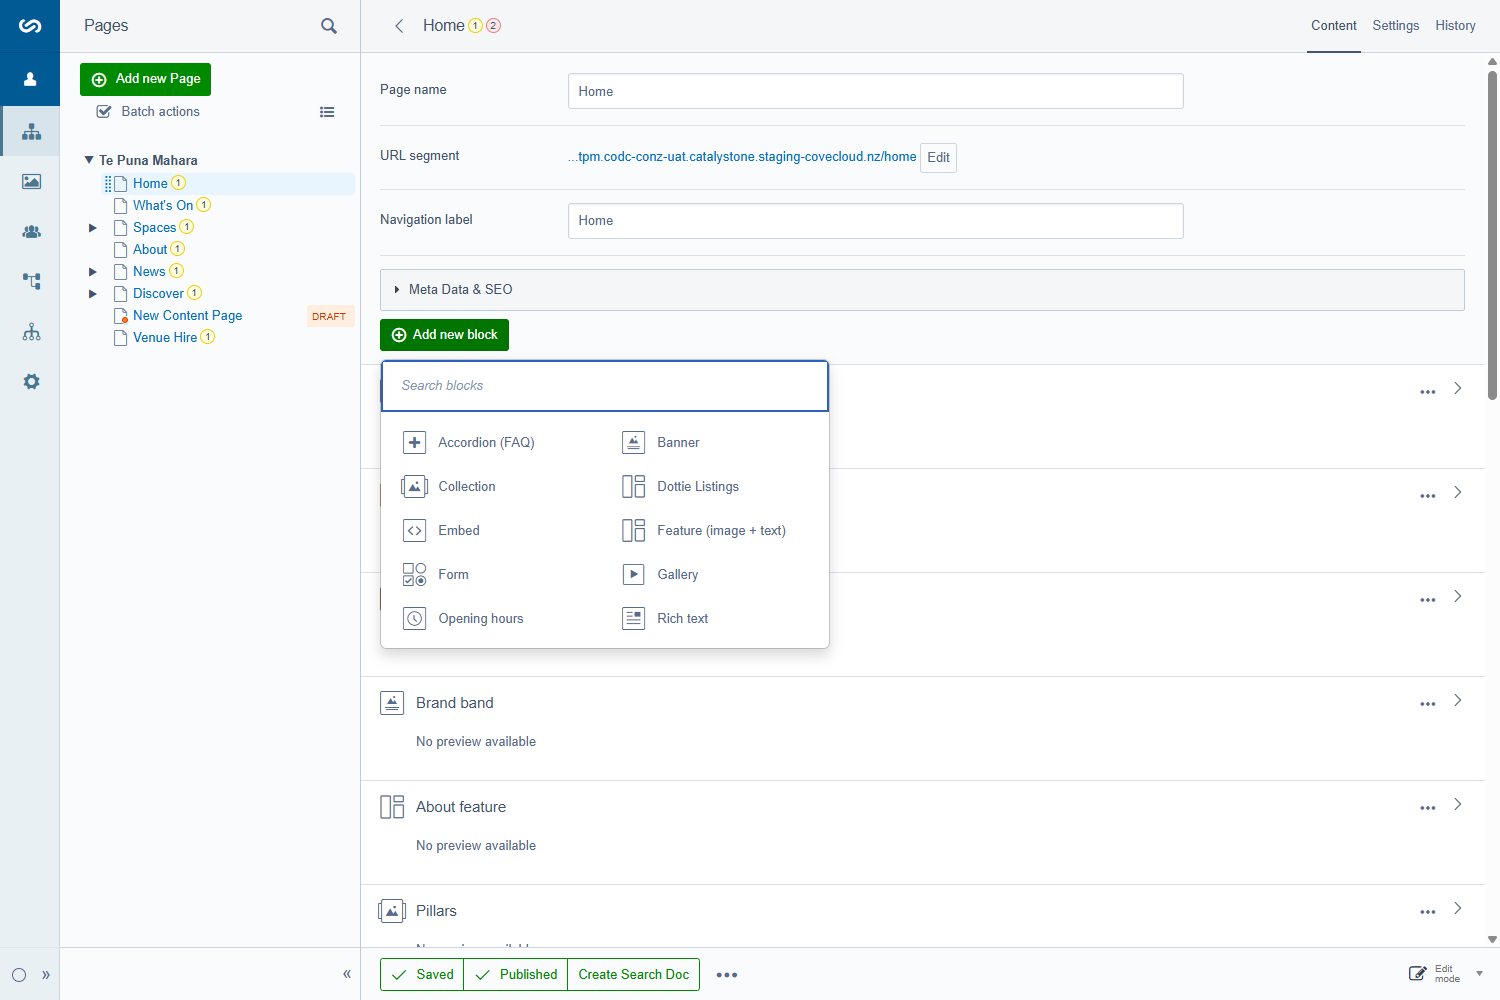
The fields every block shares
| Field | What it does |
|---|---|
| Title | A label for you, in the CMS list — "Venue hire CTA". Not shown on the website unless you tick Displayed. |
| Displayed | Shows that Title as a heading on the page. Usually leave it off and use the block's own Heading field. |
| Style variation Custom CSS classes | Developer settings. Leave empty. |
| HTML Anchor | Optional. Lets you link straight to this block, e.g. /venue-hire#rates. |
| Remove bottom margin | Tucks this block hard against the next one, so two bands read as one. |
A stack of "Untitled Rich text block" entries is miserable to work with. Name blocks the way you'd describe them out loud: "Opening hours", "Rate tiers", "Memorial band".
Reordering, duplicating, removing
- Reorder — drag the dotted handle on the left of a block. On a long page, drag in short hops.
- Duplicate — … → Duplicate. The fastest way to build a matching band.
- Remove — … → Archive. It leaves the page but can be recovered by your web contact. There's no hard delete, on purpose.
- Hide temporarily — … → Unpublish. The block stays in the editor but drops off the live page.
Section 5
The block library
Ten blocks build the entire site. For each one: what it's for, its fields, the editor, and what it looks like live.
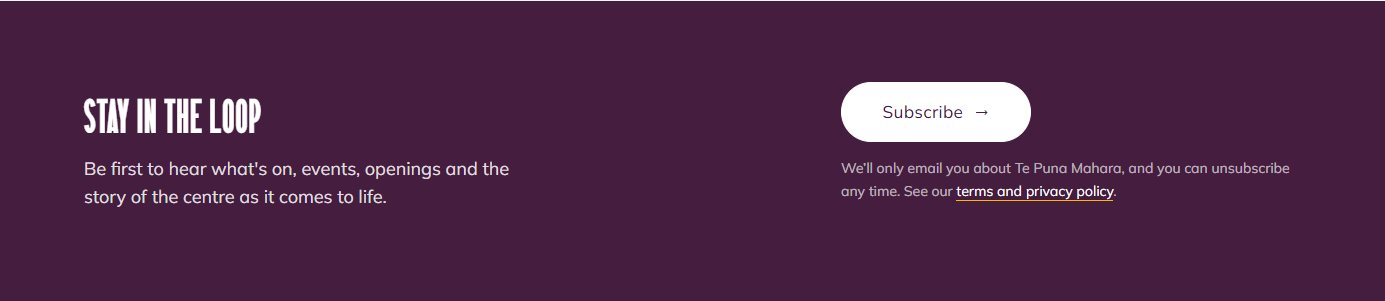
Banner Big statements — heroes, coloured bands, calls to action, the newsletter sign-up
One block, four Variants. Pick the variant first; it changes which fields matter.
- Variant Hero / Compact / CTA / Subscribe
- Theme light or dark
- Eyebrow / label
- Heading
- Cycling words
- Subheading
- Supporting note
- Primary button
- Secondary button
- Background image
- Background video
- Social URLs
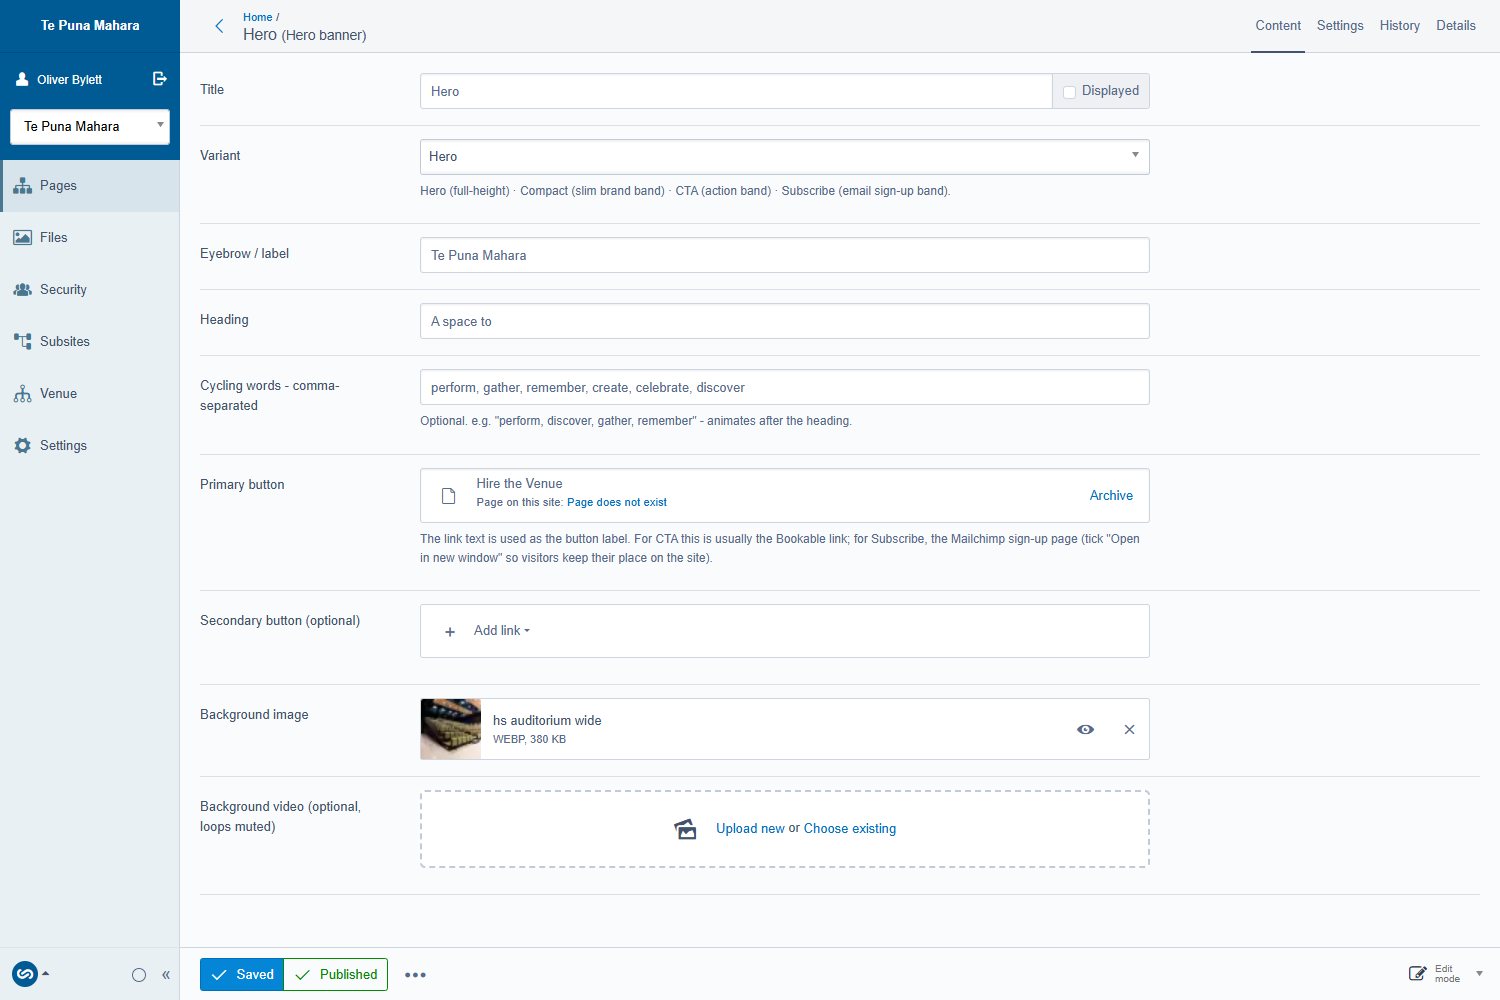
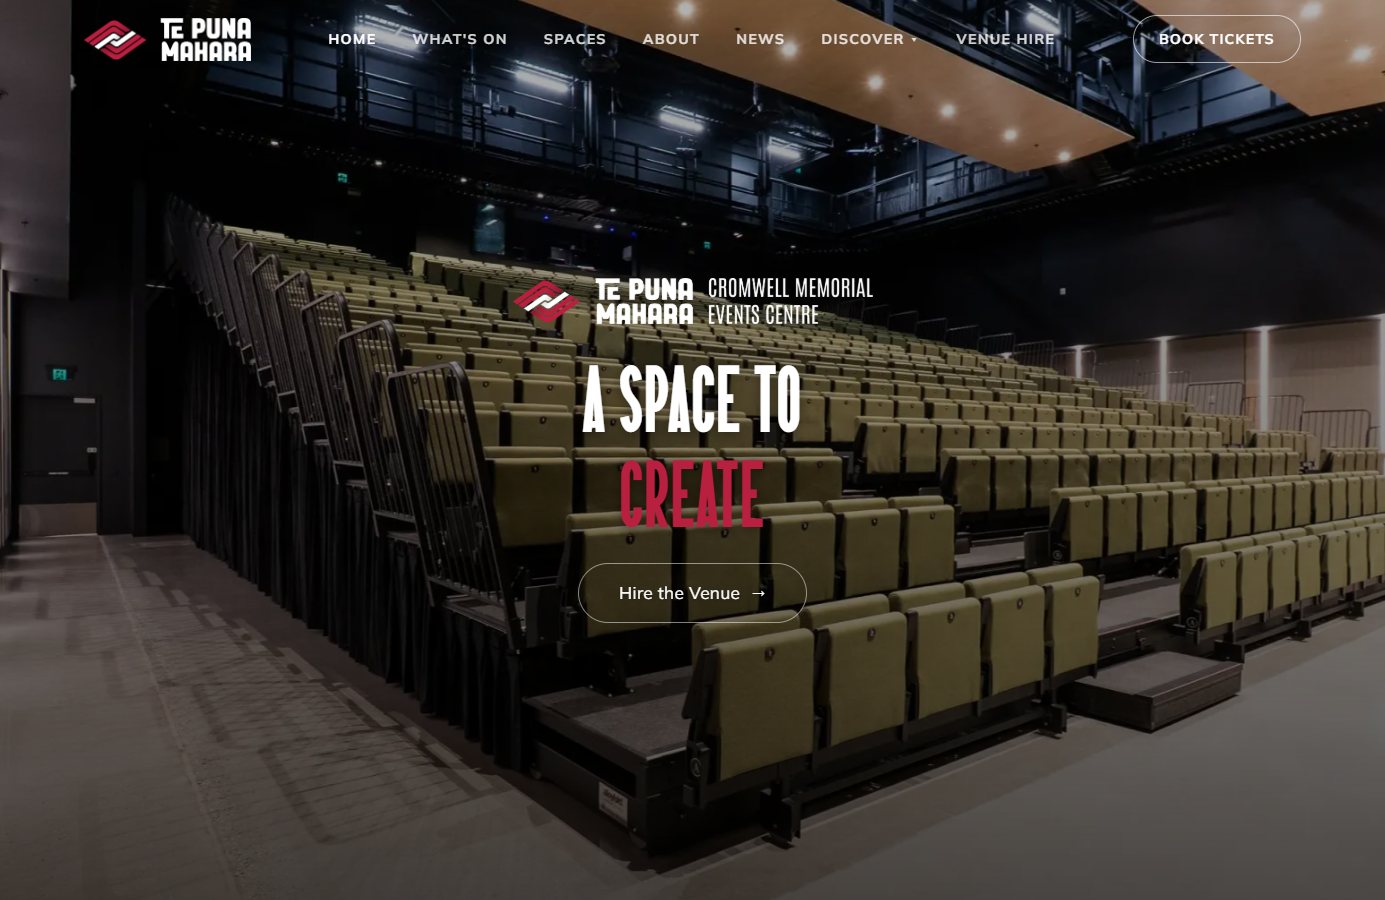

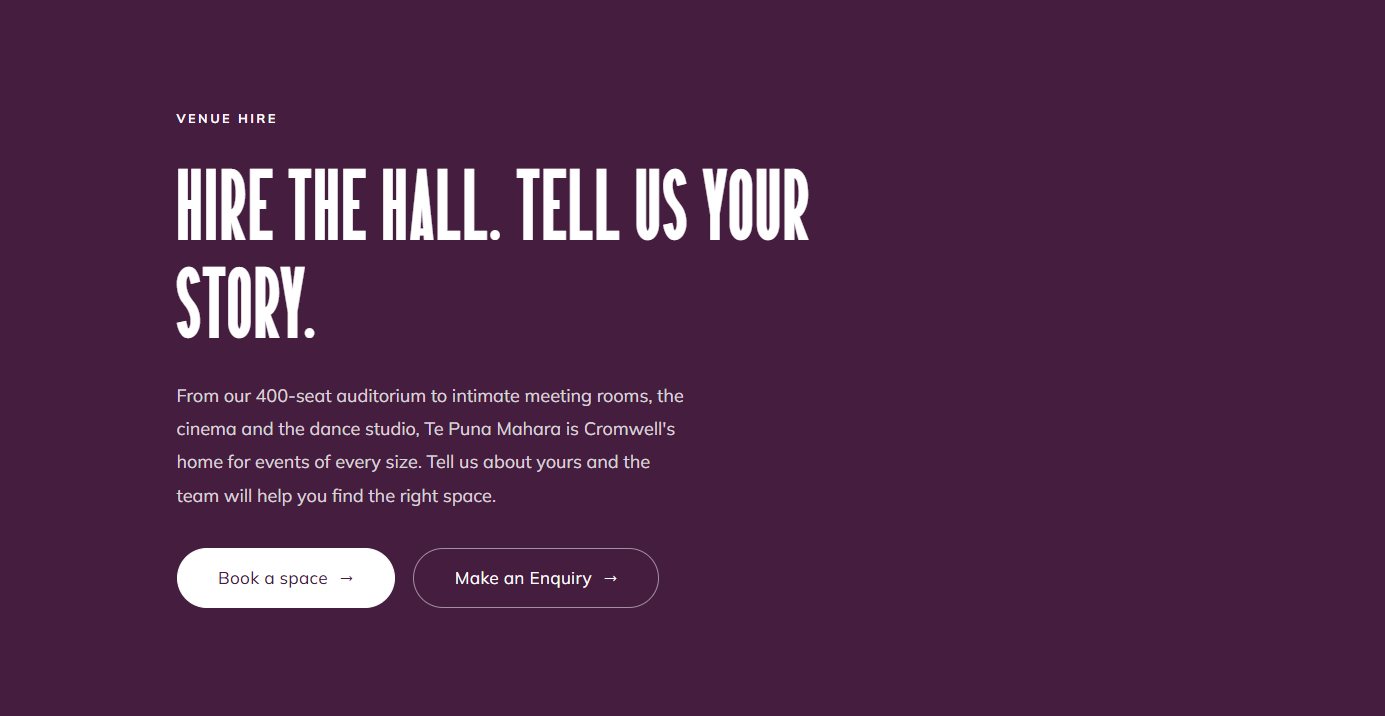
A hero photo needs to be at least 1920 px wide, with quiet space where the text sits. Text is always laid over the image — busy photos make it unreadable.
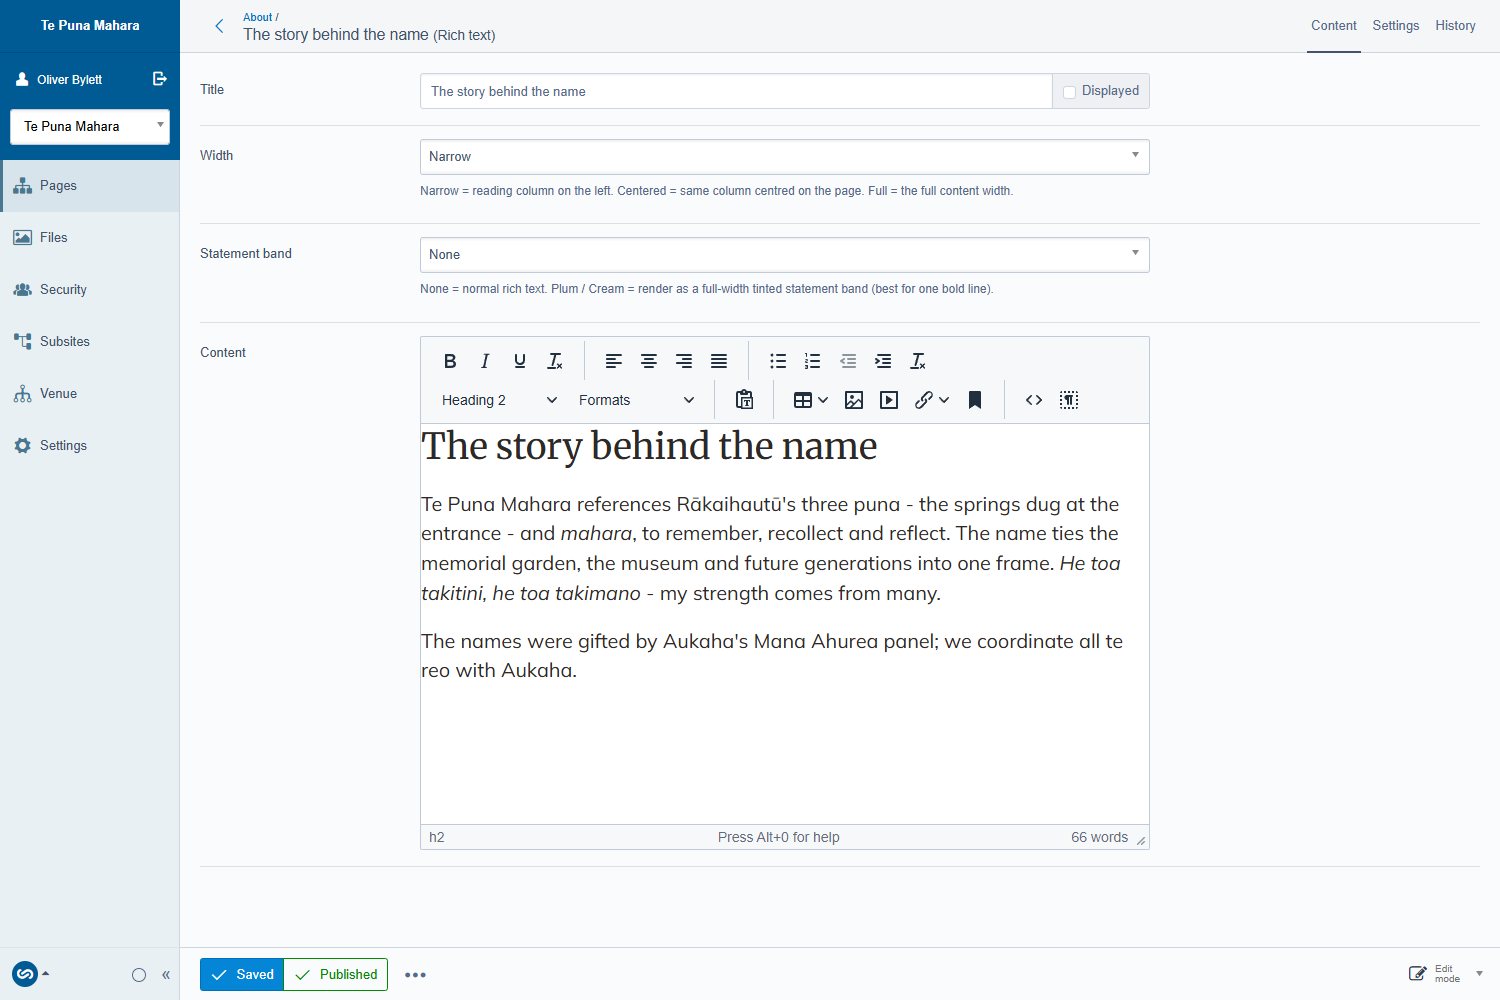
Rich text Any straight writing — paragraphs, lists, tables, a statement band
- Width
- Statement band
- Content
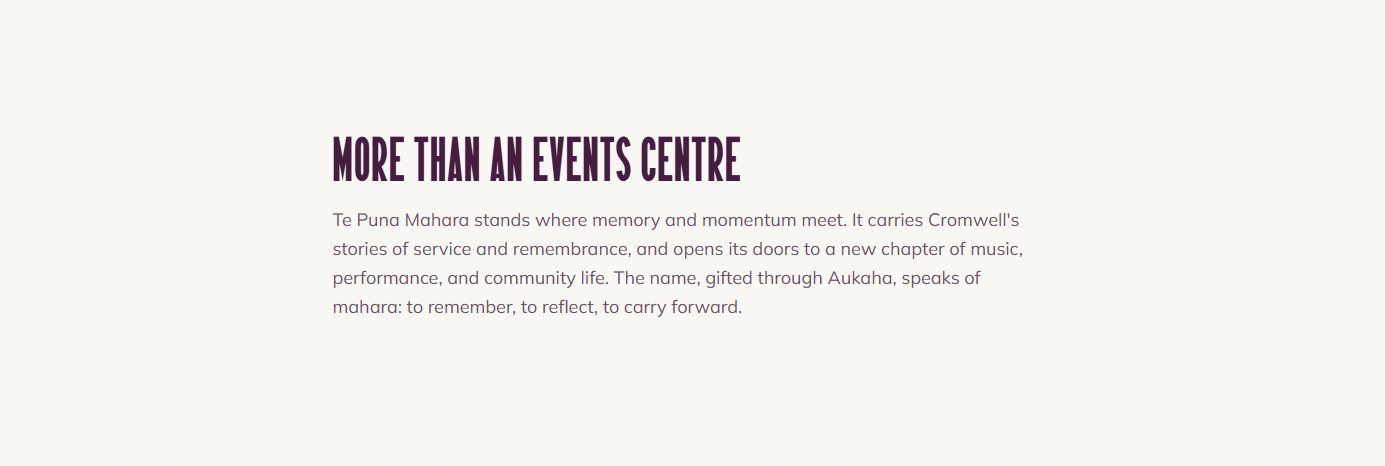
Tick Statement band to turn the text into a centred, coloured band — that's the "More than an events centre" section on the home page. Leave it off for normal body copy.
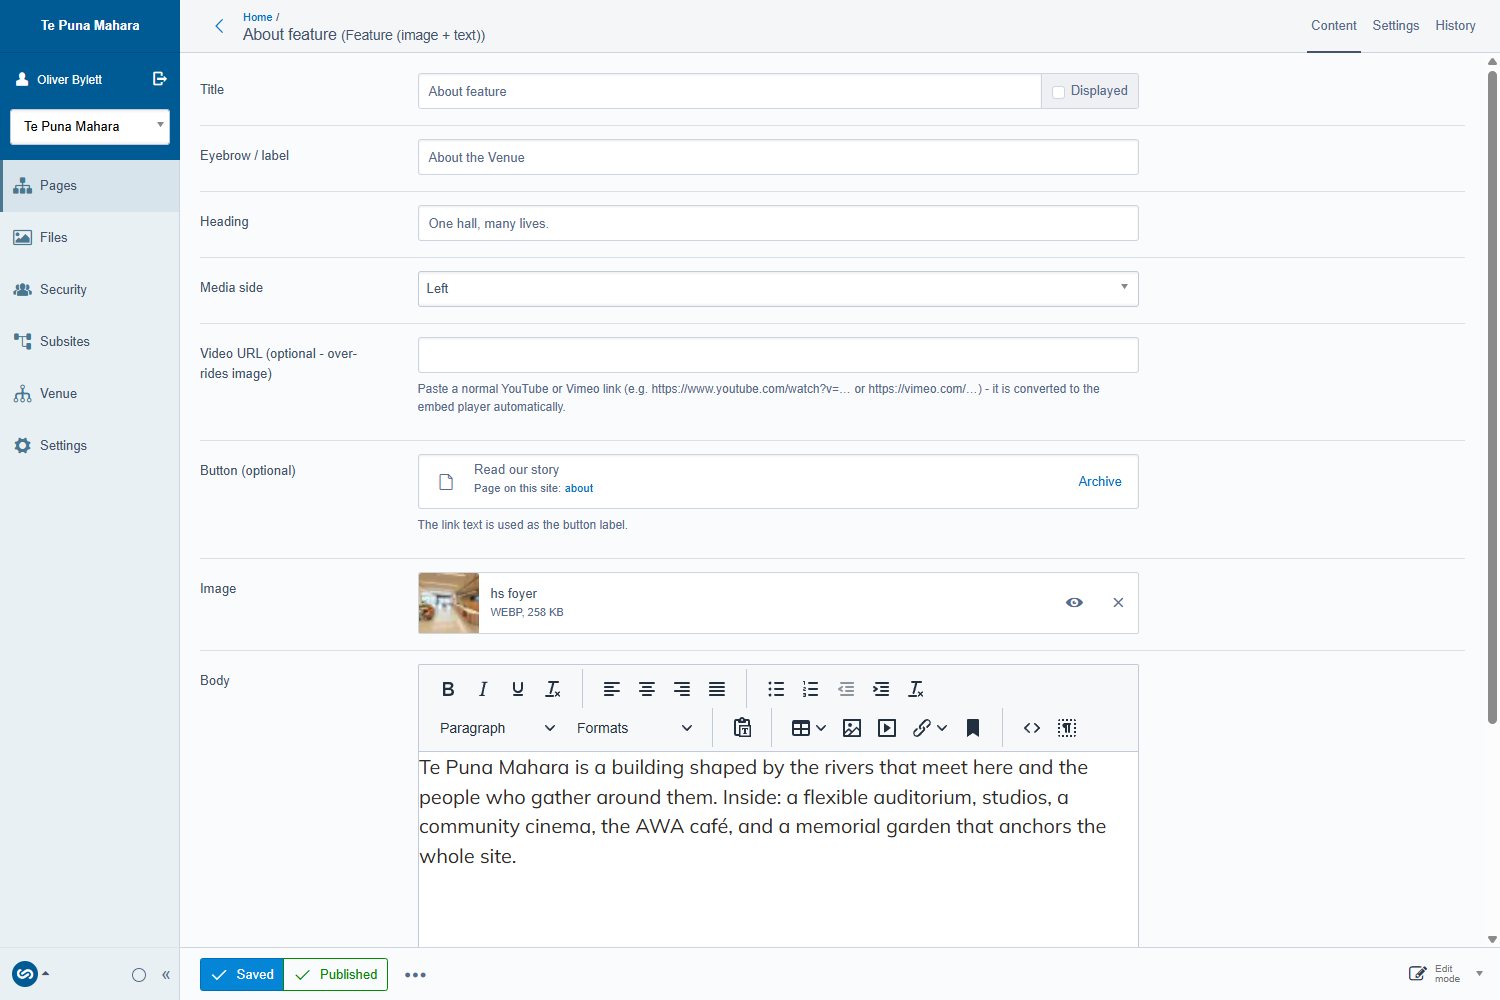
Feature A photo or video beside text — the workhorse for storytelling
- Eyebrow / label
- Heading
- Media side left / right
- Video URL
- Button
- Image
- Body
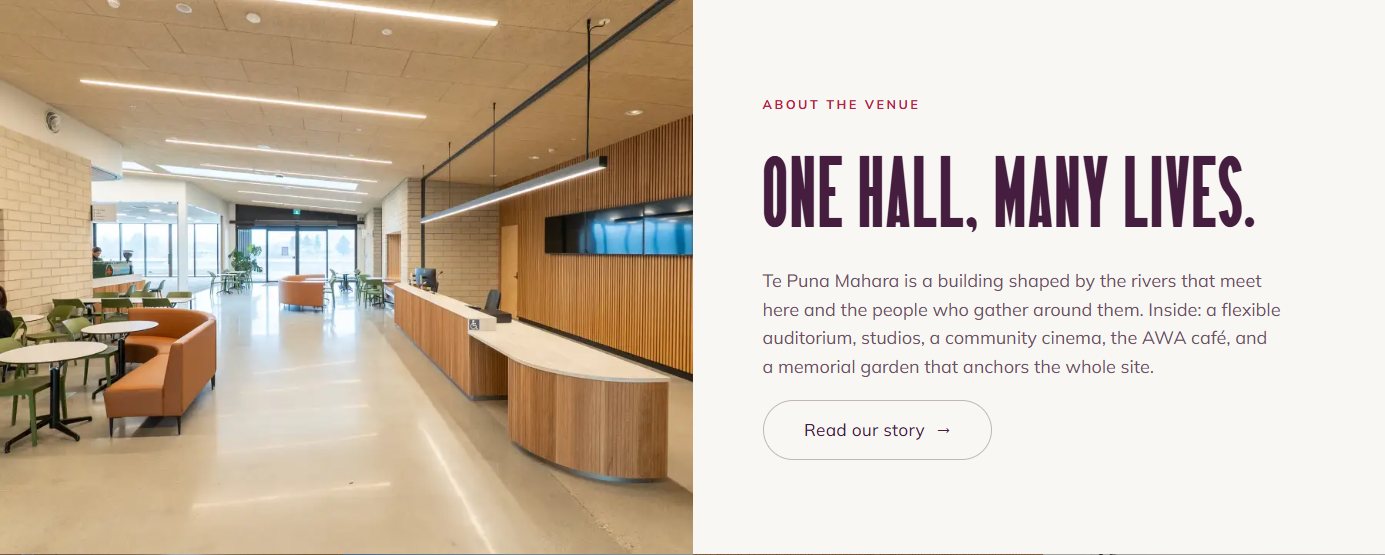
Alternate Media side down a page so features zig-zag — that's how Cinema, Café AWA, The Junction and the Gallery read on the home page. A YouTube or Vimeo link in Video URL replaces the image with a player.
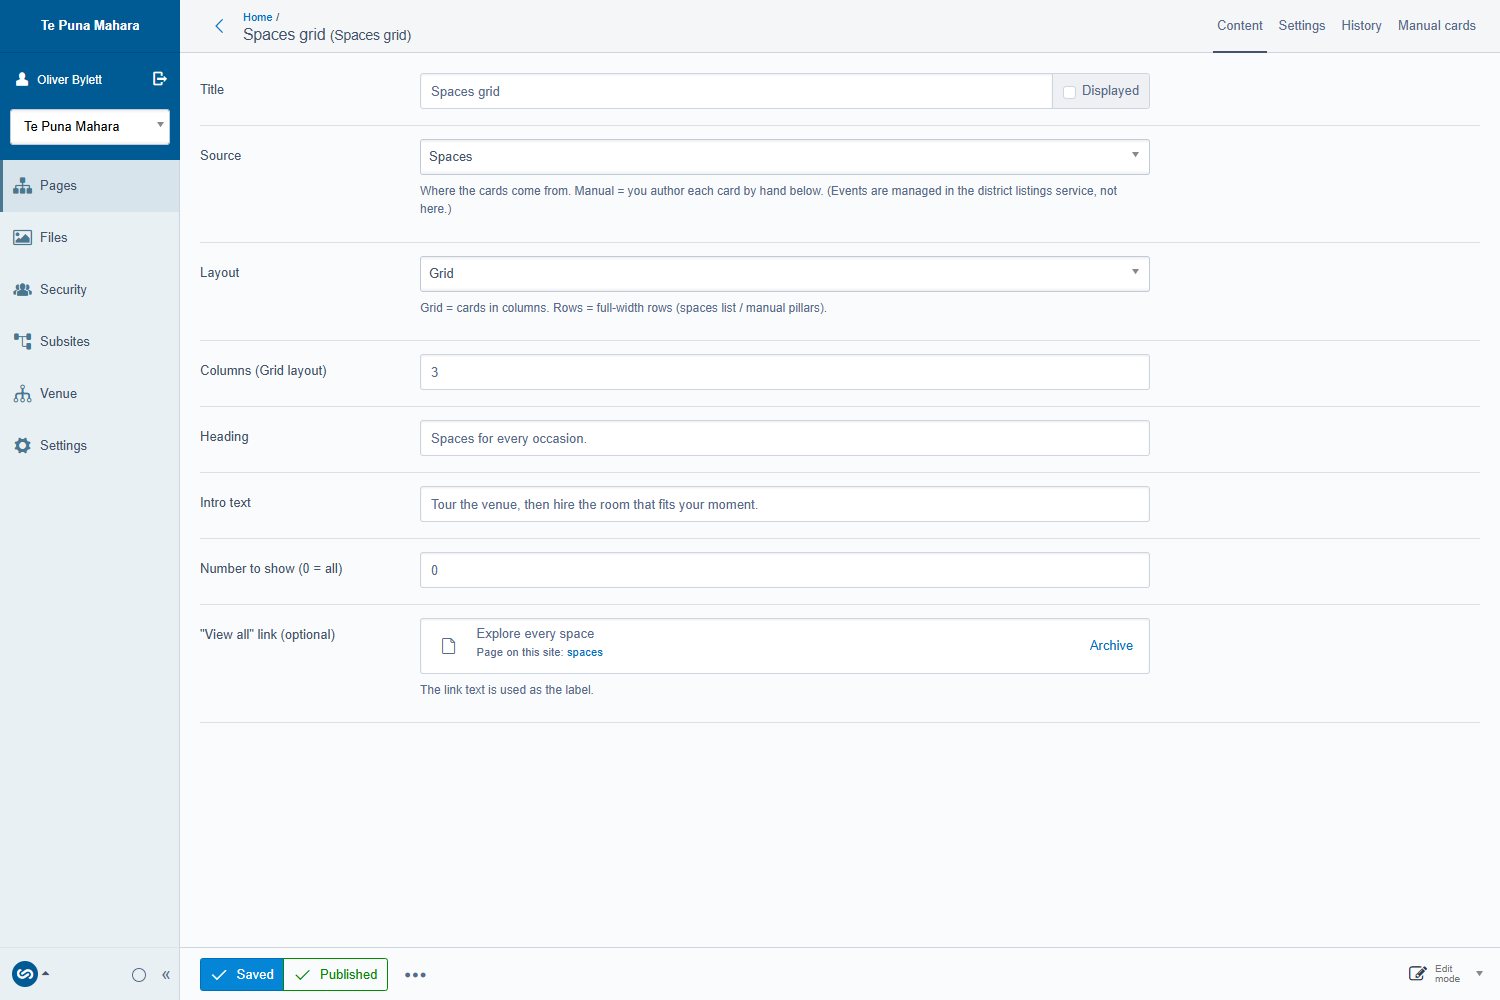
Collection Rows or grids of cards — spaces, news, team, or cards you write yourself
- Source Spaces / News / Team / Manual
- Layout Grid / Rows
- Columns
- Heading
- Intro text
- Number to show
- "View all" link
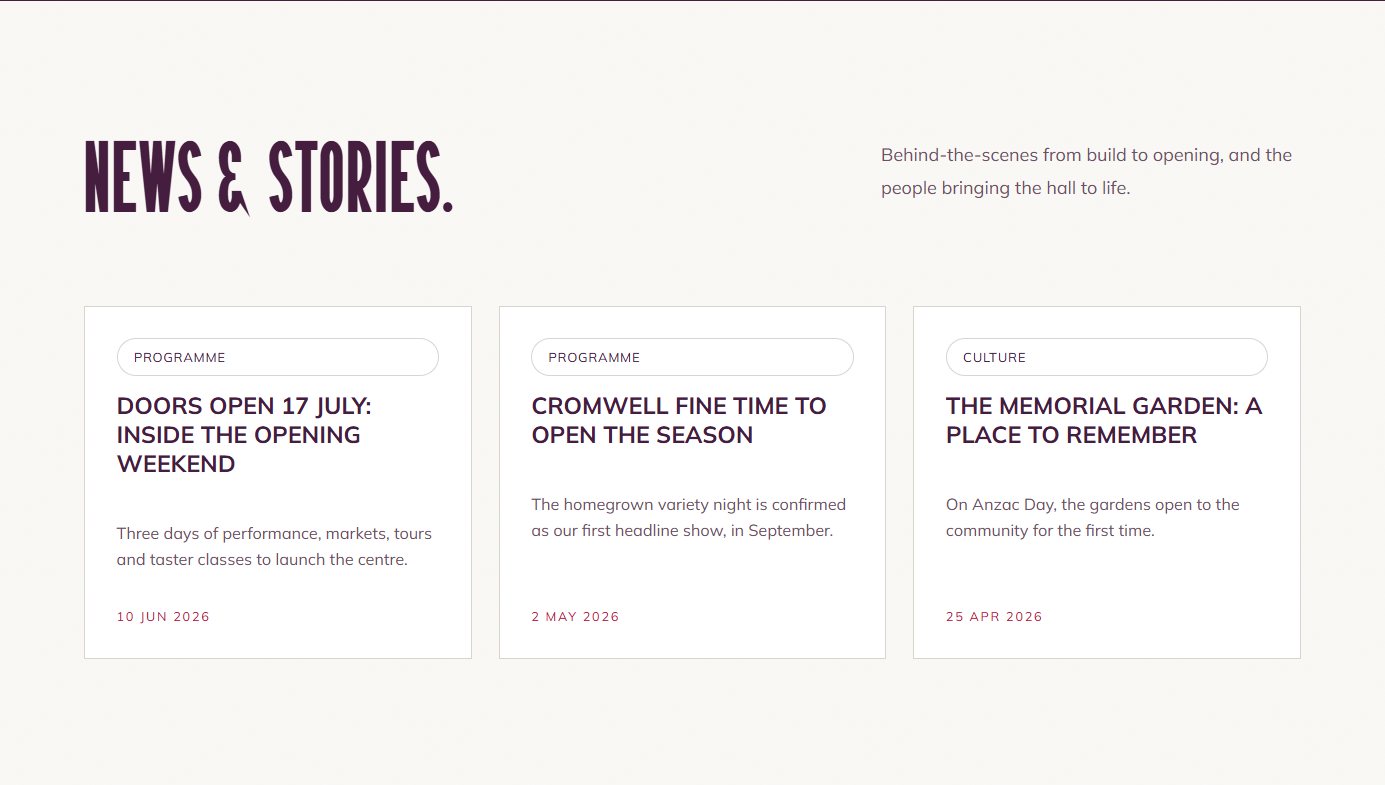
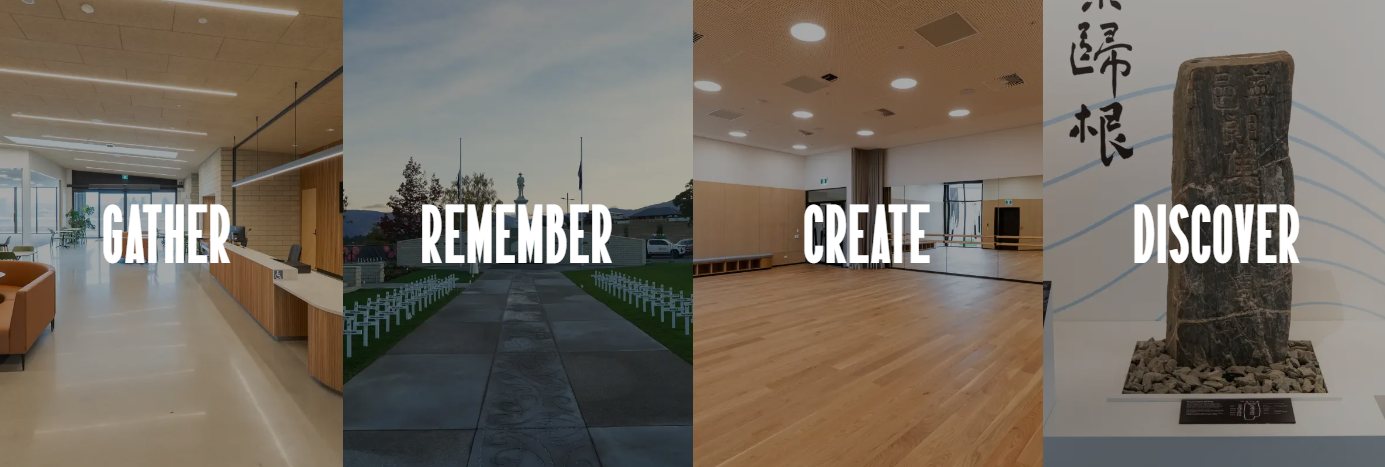
Spaces and News fill themselves from the pages you've published — add a news article and it appears here automatically. Manual lets you write your own cards (title, text, image, link), which is how the partner band and the Gather / Remember / Create / Discover pillars are built.
Save the block first, then add cards one at a time. Add each card's link from inside that card's own edit screen — links added while you're still creating the card sometimes don't stick.
Accordion FAQs and long reference lists people skim
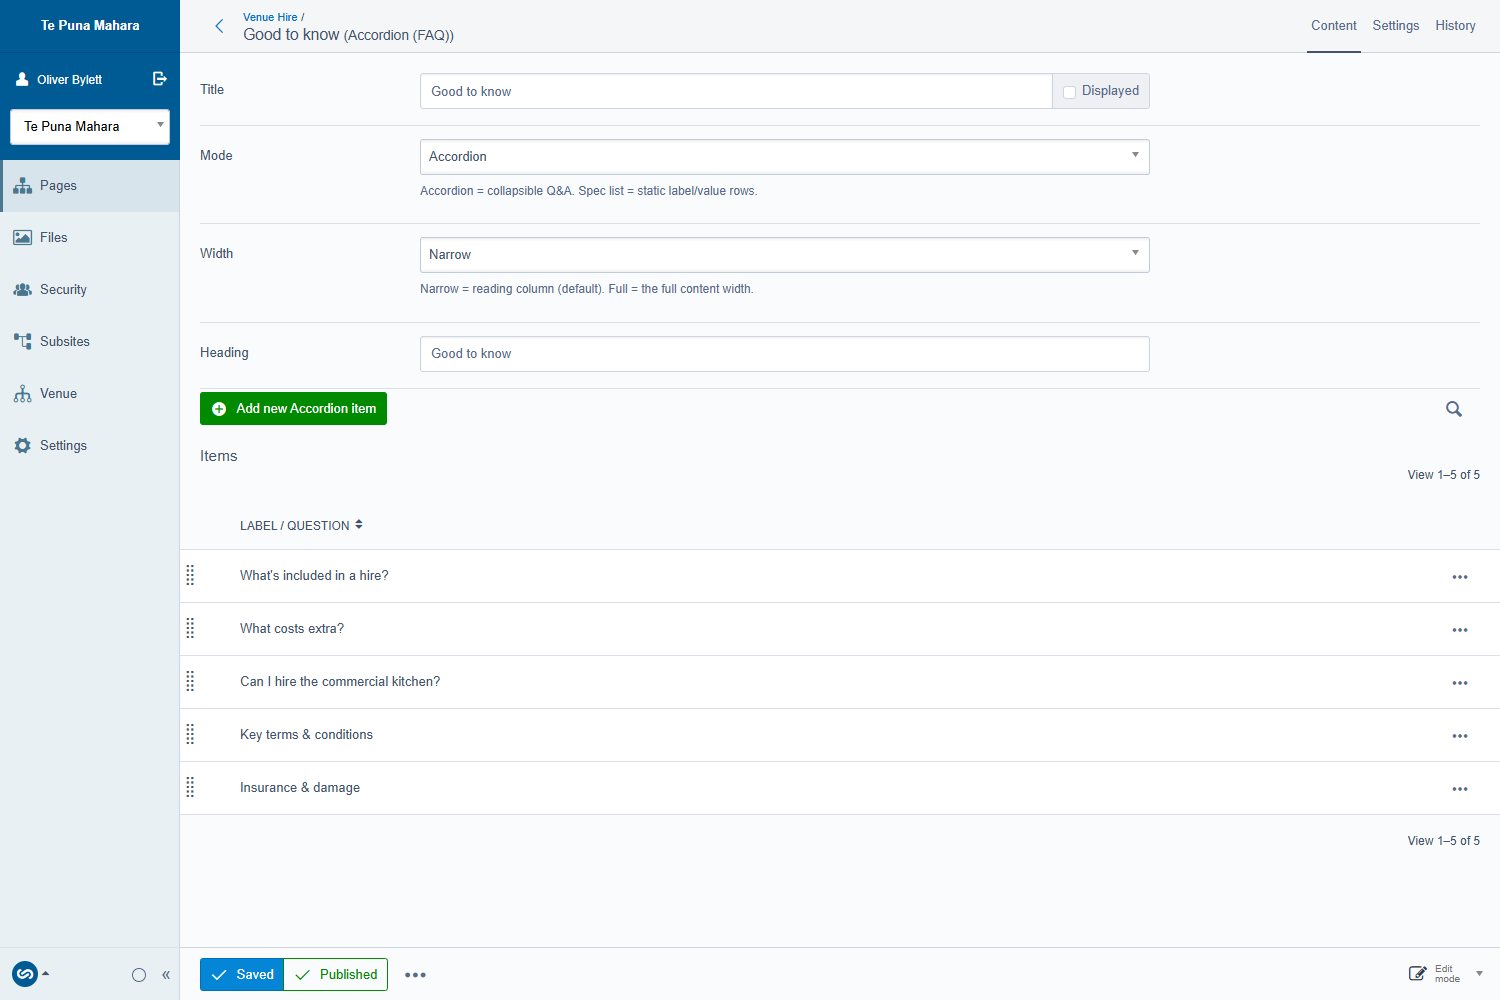
- Mode
- Width
- Heading
- Items (question + answer)
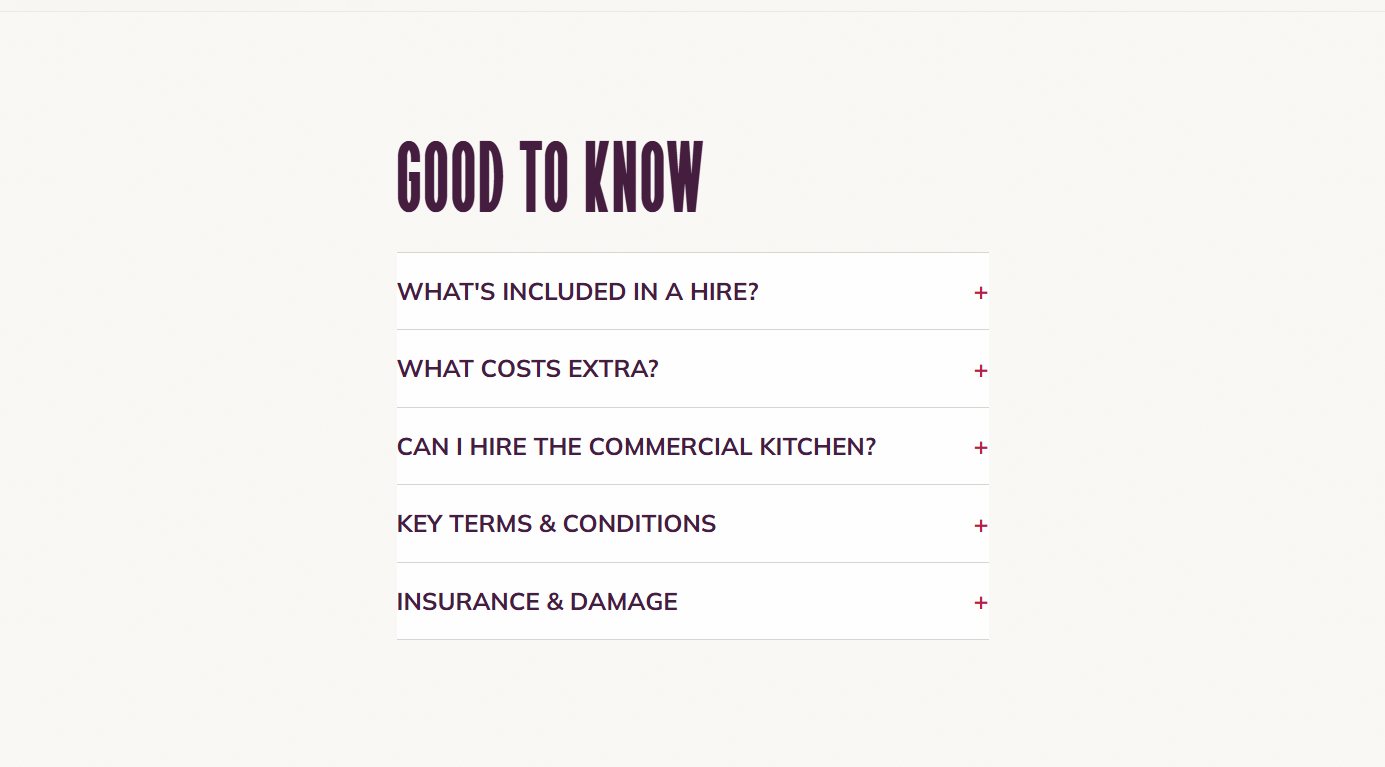
Add items with Add new inside the block. Answers take full formatting, so lists and links work inside them. Good for "Good to know" hire questions; bad for anything a visitor must not miss, because it's hidden until clicked.
Gallery A set of photos — an exhibition, an event wrap-up, a room from several angles
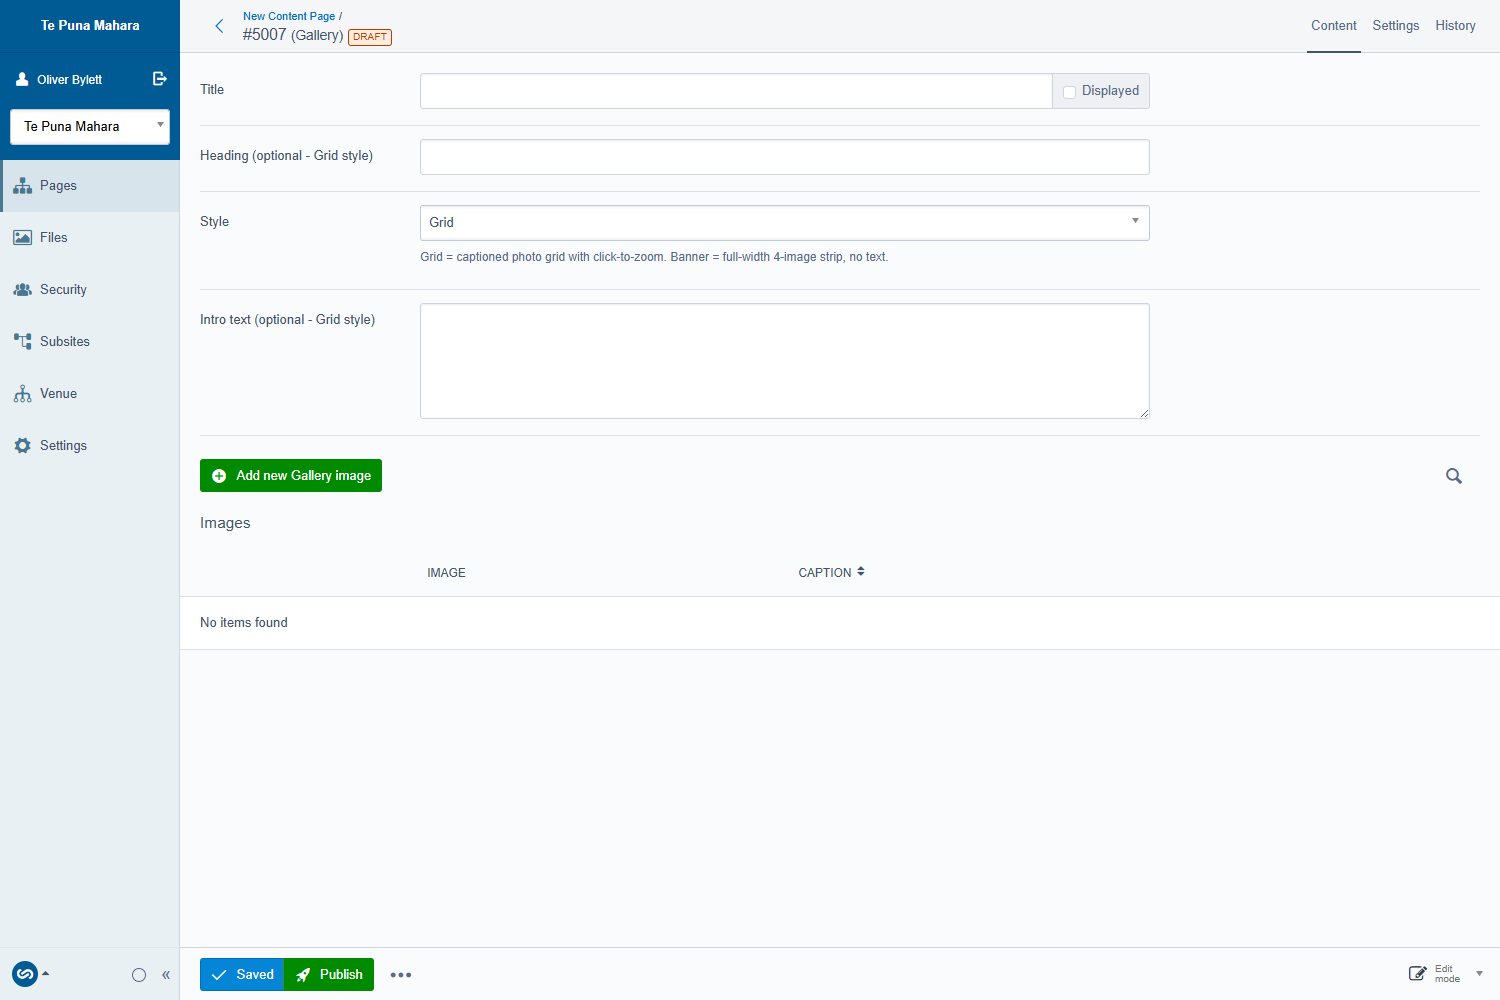
- Heading
- Style
- Intro text
- Images
Upload or choose several images at once, then drag to reorder. Keep them a consistent shape where you can — a mix of tall and wide photos makes a ragged grid.
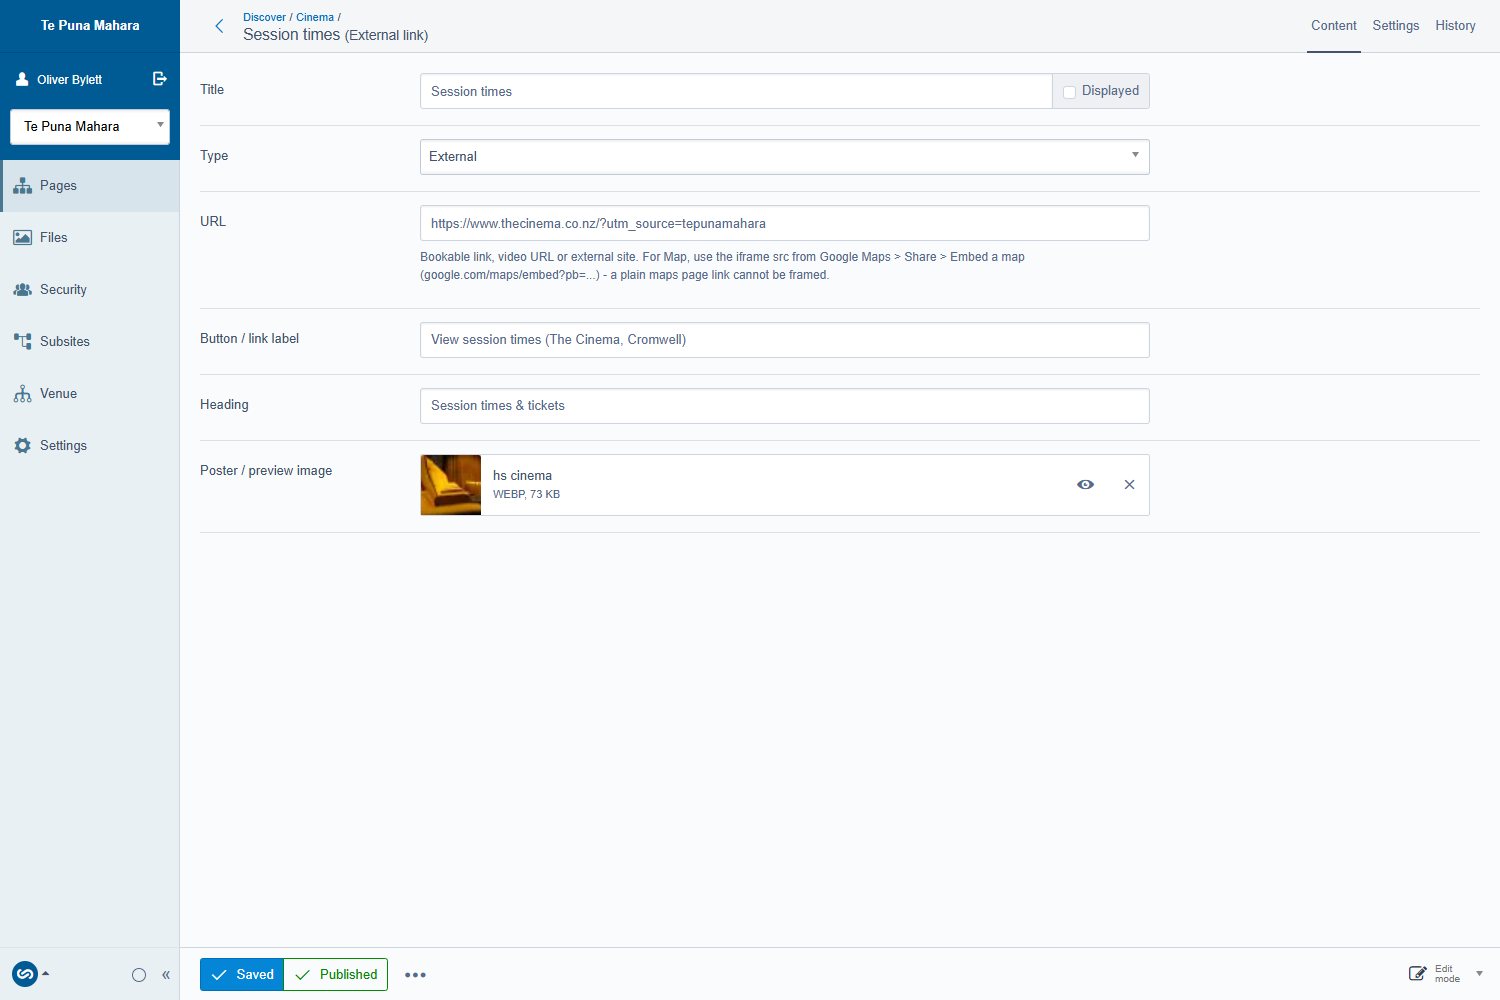
Embed Things that live somewhere else — a map, a video, a partner's site, a booking page
- Type
- URL
- Button / link label
- Heading
- Caption
- Upload a video file
- Embed code
- Poster / preview image
For most jobs you only need Type and URL. The Poster / preview image is what shows before a video plays — always set one.
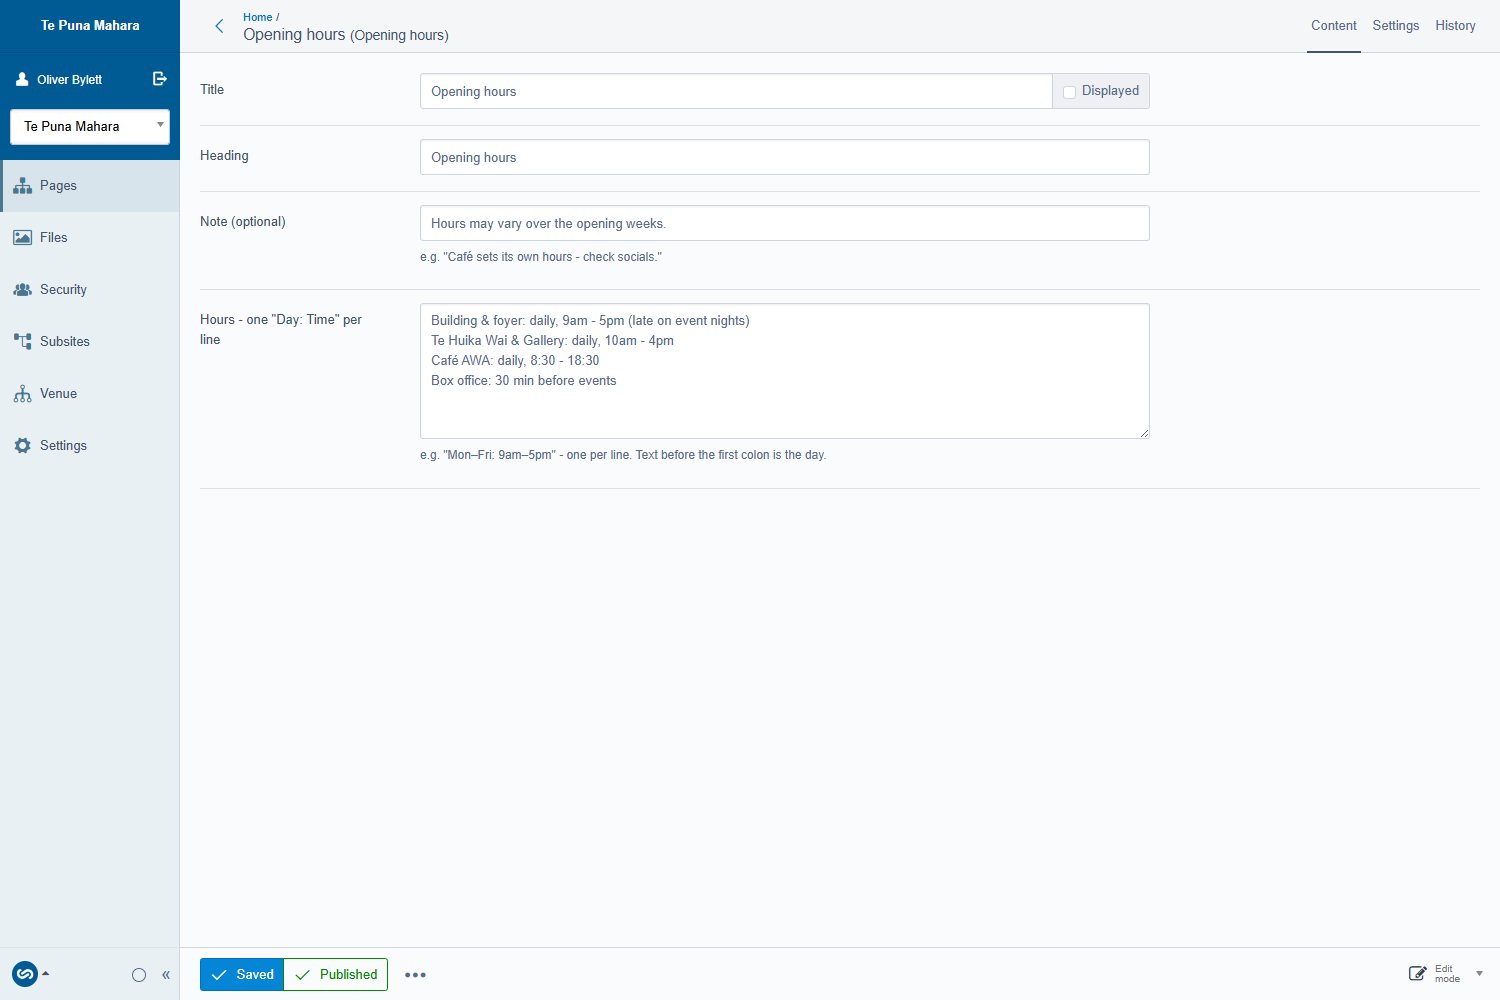
Opening hours Any set of day-and-time lines
- Heading
- Note (optional)
- Hours — one "Day: Time" per line
Type one line per row, exactly like Monday: 9am – 5pm. Use the Note for exceptions — "Closed public holidays", "Later on event nights". The café and cinema pages each have their own copy of this block.

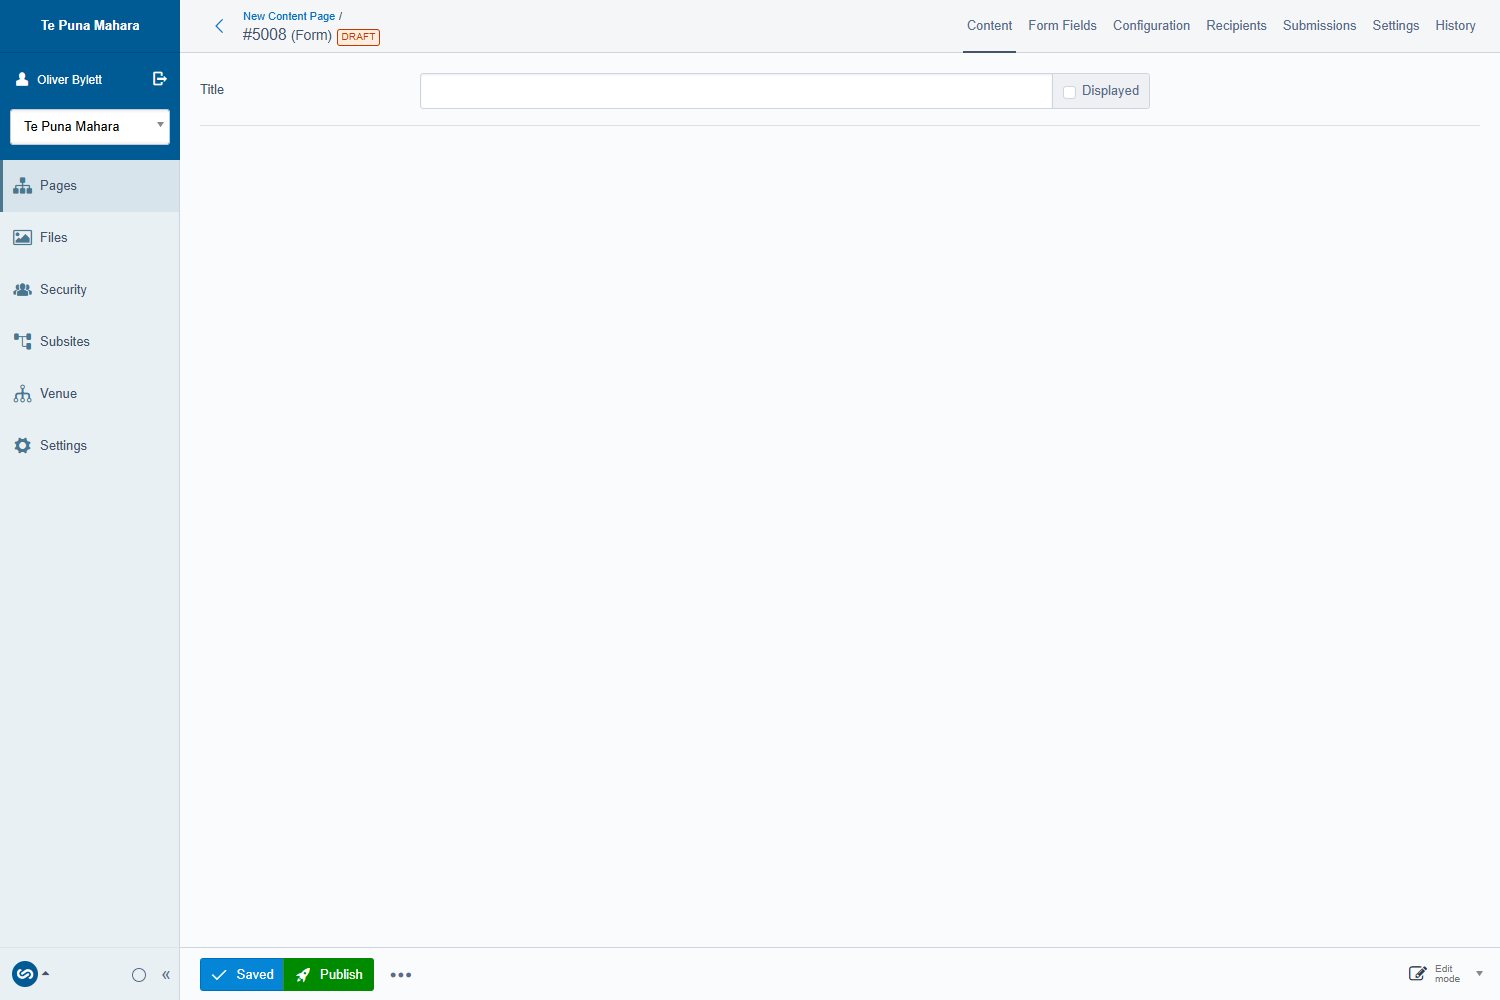
Form Enquiries, catering requests, contact forms
- Fields
- Recipient email
- Show on completion
- Submit button text
Build the questions inside the block — Add new Field for each one — then set who submissions are emailed to and what the thank-you message says. Test every new form by submitting it yourself before you tell anyone about it.
Only ask for what you actually need, and never use a form to collect card details. Files people attach land in Files → Form-submissions.
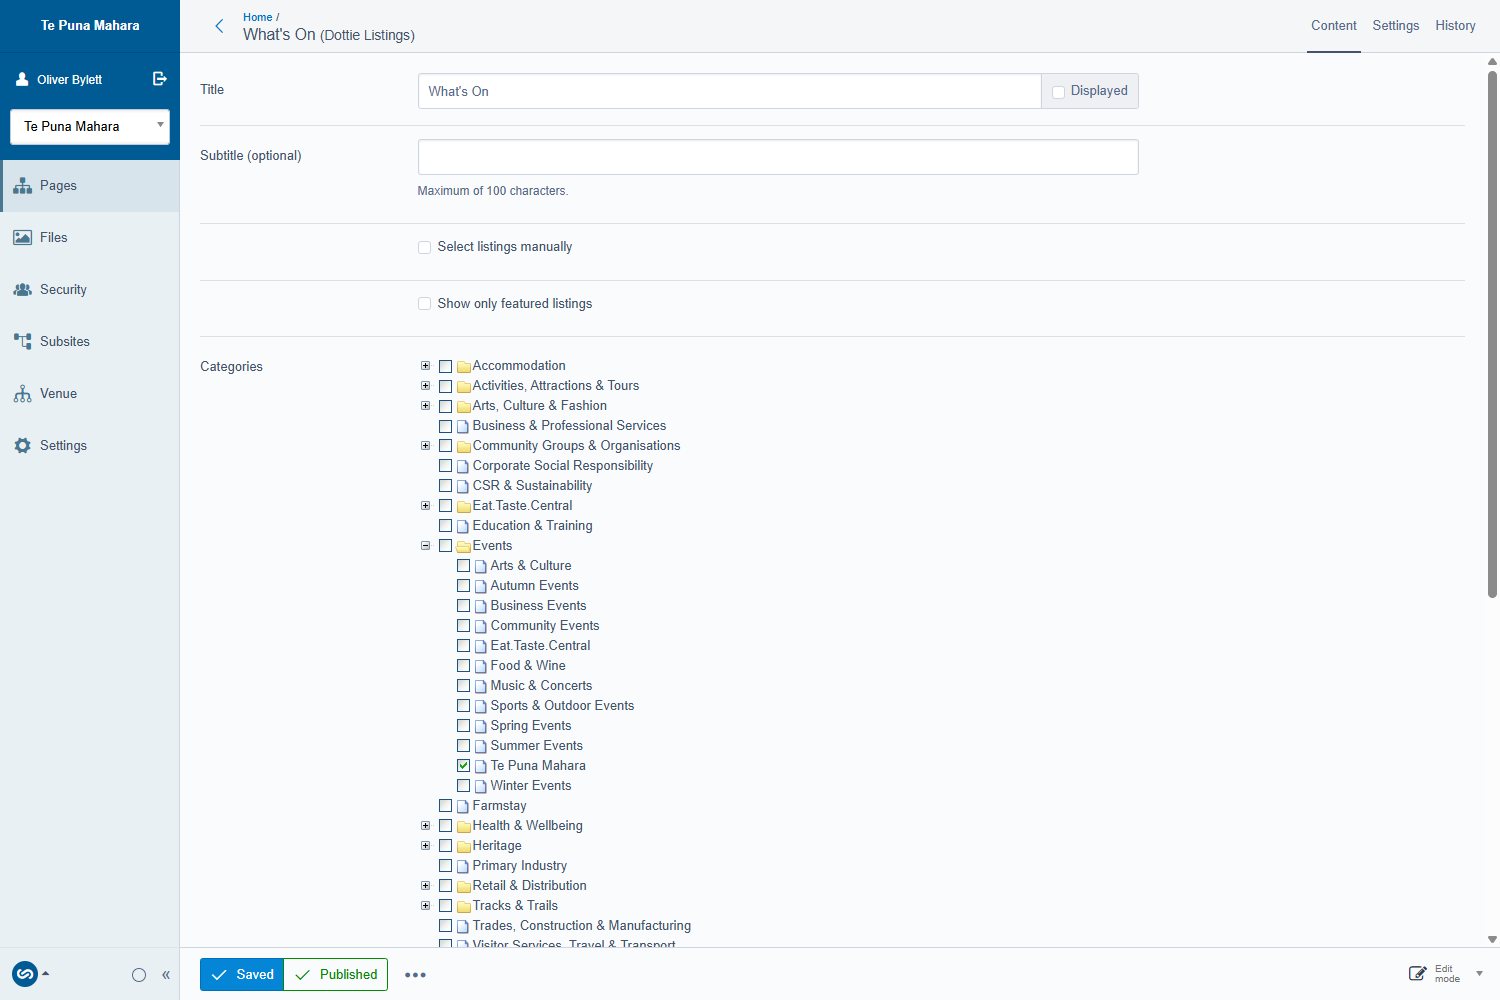
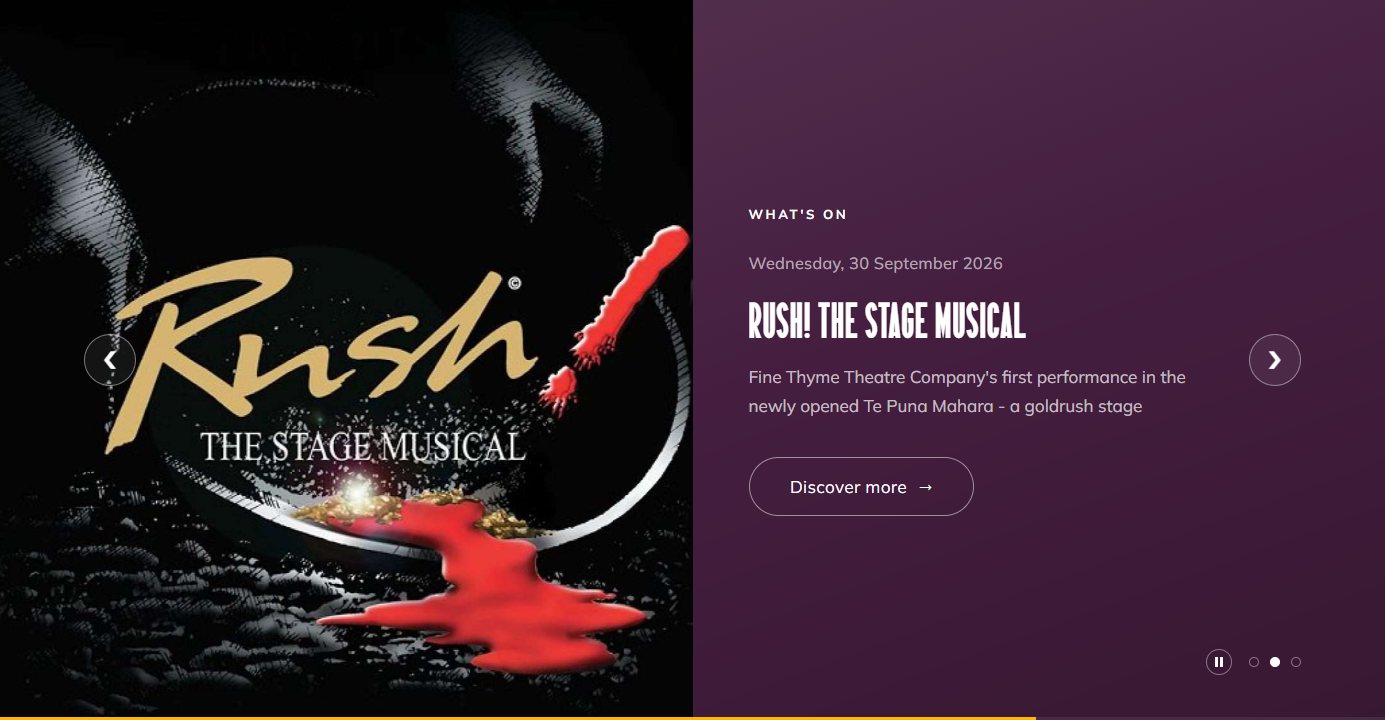
Dottie Listings Live events, pulled from the district listings system
- Title / Subtitle
- Categories = Te Puna Mahara
- Select listings manually
- Show only featured
- Region / Location
- Limit
- Display as hero slider
- Link button
This block drives the What's On slider on the home page. It asks Dottie for events every time someone loads the page, so you never touch it when an event changes — you change the event in Dottie.
Categories must stay set to Te Puna Mahara, and Show only featured must stay off. Together they're what keeps the slider showing our events instead of all 600-odd district listings.
Section 6
Writing & formatting
Every text field uses the same editor. The site handles the styling — your job is structure and words.
The toolbar
| Control | Use it for |
|---|---|
| Bold / Italic | Emphasis inside a sentence. Never for headings — use a heading format. |
| Formats → Heading 2 / 3 | Real sub-headings. They give the page structure, and help search engines and screen readers. |
| Bullet / numbered list | Lists. Numbered only when the order matters. |
| Paste as text | Always use this when pasting from Word, Outlook or a website. It strips the invisible formatting that otherwise breaks the page's look. |
| Table | Rates and specifications. Tables pick up the venue's striped styling automatically. |
| Insert from Files | Put an image, or a link to a PDF, into the text. |
| Insert link | Link to a page, a file, an email address or another website. |
| Source code Show blocks | Developer tools. Leave them alone. |
Links
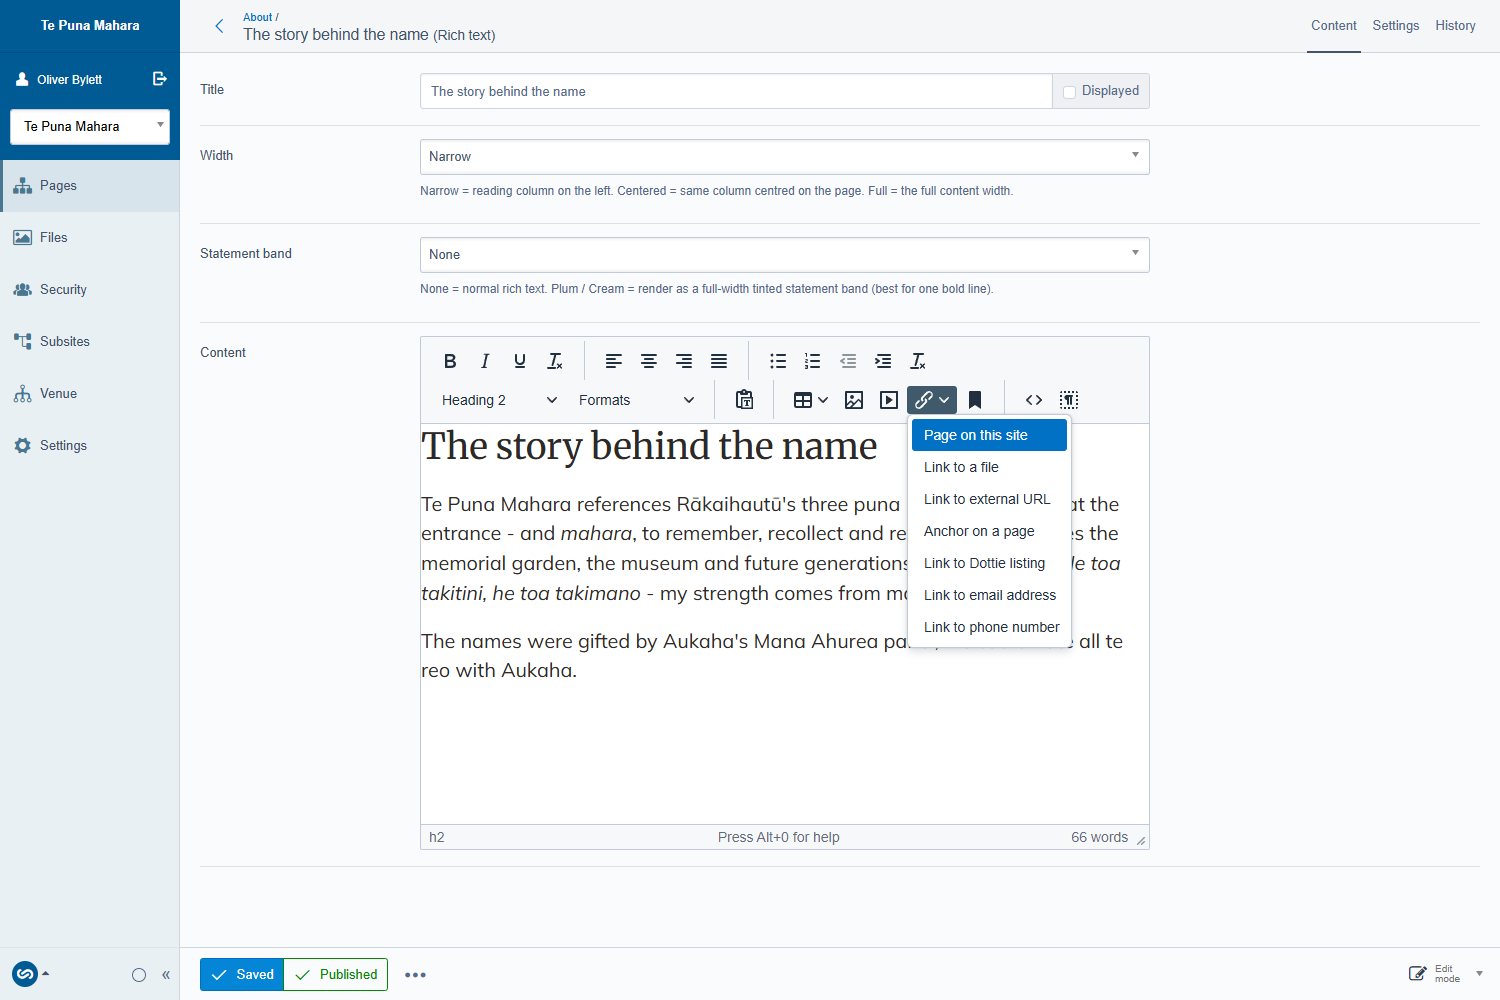
https:// address.- Write links as what they lead to — "Download the Venue Hire Guide", not "click here".
- Tick open in new window for links that leave the site (partners, booking, ticketing) and for PDFs.
- To link to a child page, use the search box in the picker rather than hunting through the tree.
House style
- Macrons matter. Te Puna Mahara, Te Huika Wai, whakataukī. Copy and paste them rather than retyping if your keyboard makes it hard.
- Headings are set in the venue's condensed display face automatically — type them in normal sentence case and let the site do the shouting.
- Dates in full: Saturday 18 October. Times as 6pm, 10.30am.
- Keep paragraphs short. Two or three sentences reads far better on a phone, which is where most people will see this.
Section 7
Images, video & PDFs
Photography does most of the work on this site. Good, big, well-lit photos of the real building beat anything else you can do to a page.
The Files area
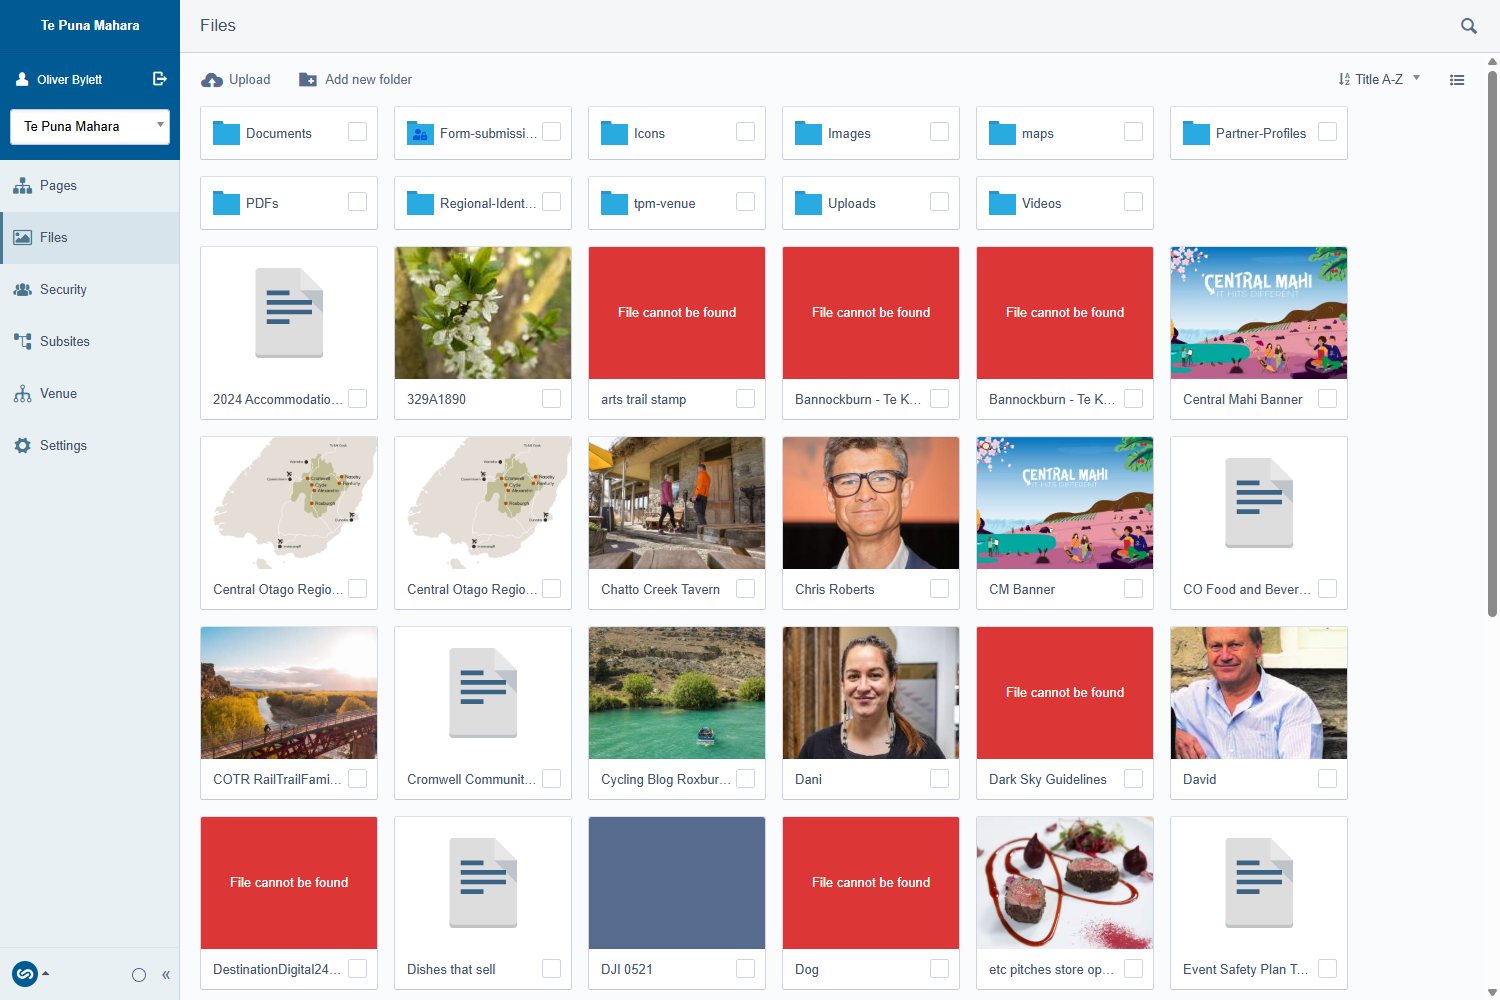
tpm-venue. Keep new uploads in a sensible folder — files dumped at the top level are impossible to find later.What to upload
| Use | Size | Notes |
|---|---|---|
| Hero / background | 1920 × 1080 px | Landscape. Keep one area quiet — text sits over it. |
| Feature image | about 1600 px wide | Landscape or portrait both work. |
| Cards & events | about 1400 × 1200 px | Roughly square crops best. |
| Format | JPG or WebP | WebP is smaller and sharper. AVIF files are rejected by the platform. |
| File size | under about 500 KB | The site makes its own smaller versions, but a 12 MB camera file slows everything down. |
auditorium-concert-seating.jpg beats DSC_4471.jpg. You'll be searching for it in a year.
Putting an image on a page
- Open the block and find its image field.
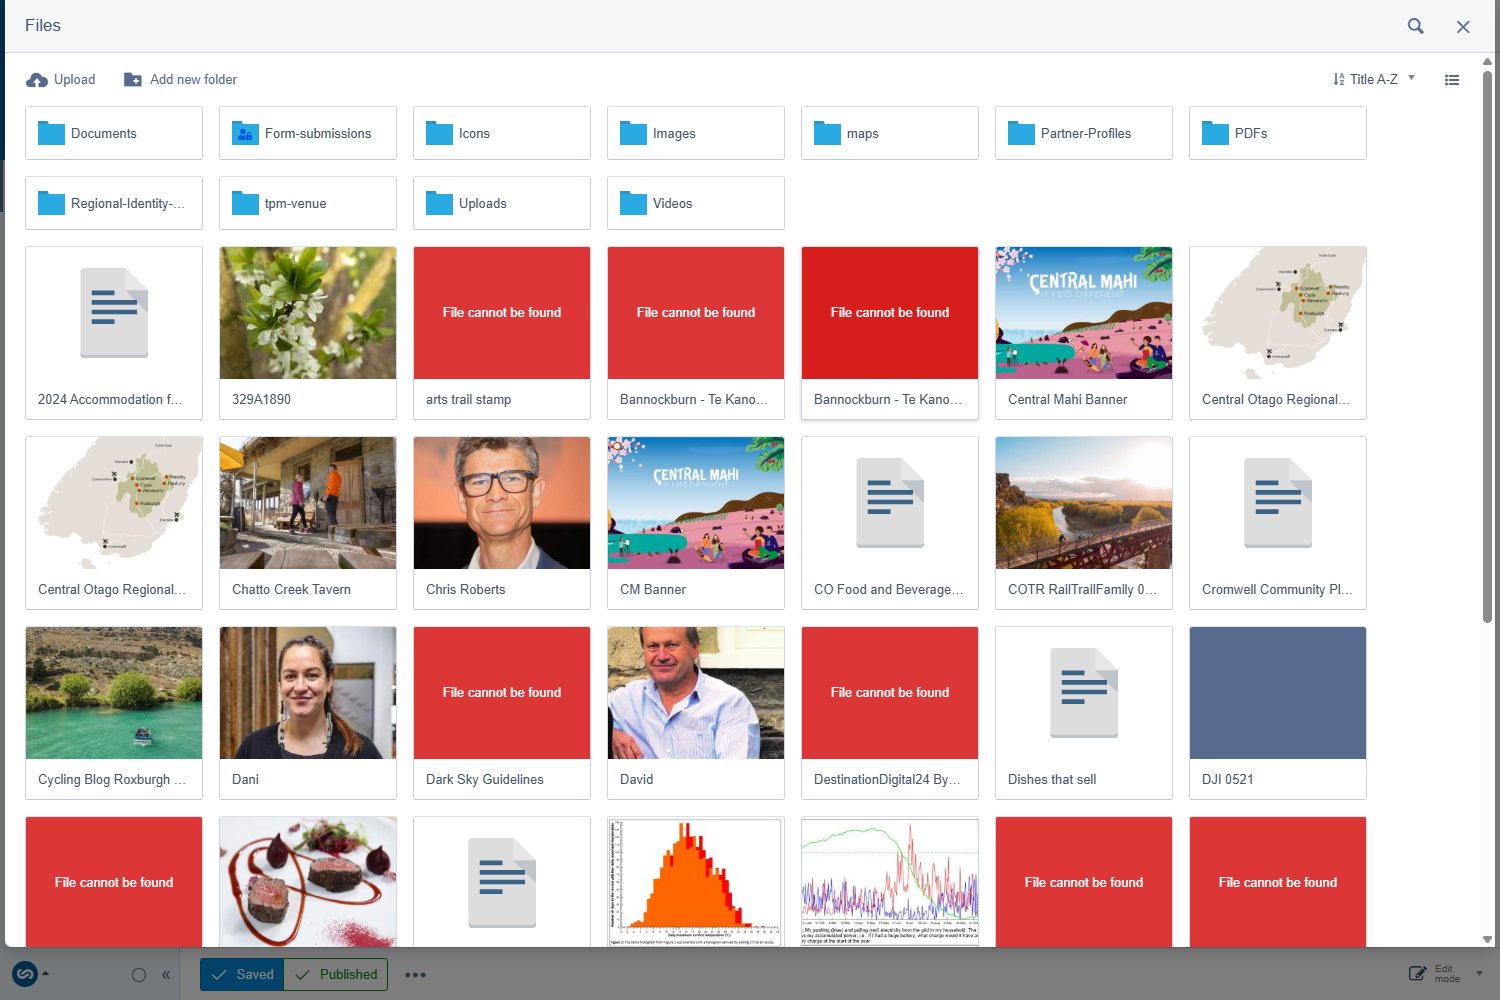
- Upload a new file, or Choose existing to reuse one already in Files.
- In the picker, use Show search to find a file by name rather than scrolling.
- Click Insert, then save the block.
To replace an image that's already there, remove the current one first (the × beside it), then upload or choose the new one. Dropping a new file on top of an old one doesn't always take.
A freshly uploaded file is a draft until it's published — open it in Files and click Publish, or publish the page it sits on. If an image looks fine to you but is invisible to the public, this is usually why.
Alternative text
Every meaningful image needs a short description for people using screen readers. Describe what's in it — "The auditorium set for a concert, 400 seats" — not the file name. Set it on the file in the Files area.
Video
Paste a YouTube or Vimeo link into a Feature block's Video URL, or use an Embed block. Uploading raw MP4s is possible but heavy — prefer a hosted link, and always set a poster image.
PDFs
Upload to Files (the Venue Hire Guide lives in tpm-venue), publish the file, then link to it from text with Insert from Files. Set the link to open in a new window, and say in the link text that it's a PDF.
Section 8
Saving, drafts & publishing
Nothing you type reaches the public until you publish. That's the safety net — use it.
| Button | What happens |
|---|---|
| Save | Stores your work as a draft. The live page doesn't change. |
| Publish | Pushes the current draft — page and its blocks — live. |
| Unpublish | Takes the page off the site. It stays in the CMS. |
| Archive | Removes it from the tree. Recoverable, but ask your web contact. |
- Edit your blocks, saving as you go — especially before you walk away, because the CMS logs you out after a while.
- Preview the page in another tab, and check it reads well at phone width too.
- Click Publish on the page. That publishes its blocks with it.
- Load the live page and confirm. Publishing is effectively instant, though a page can take a minute to refresh for everyone.
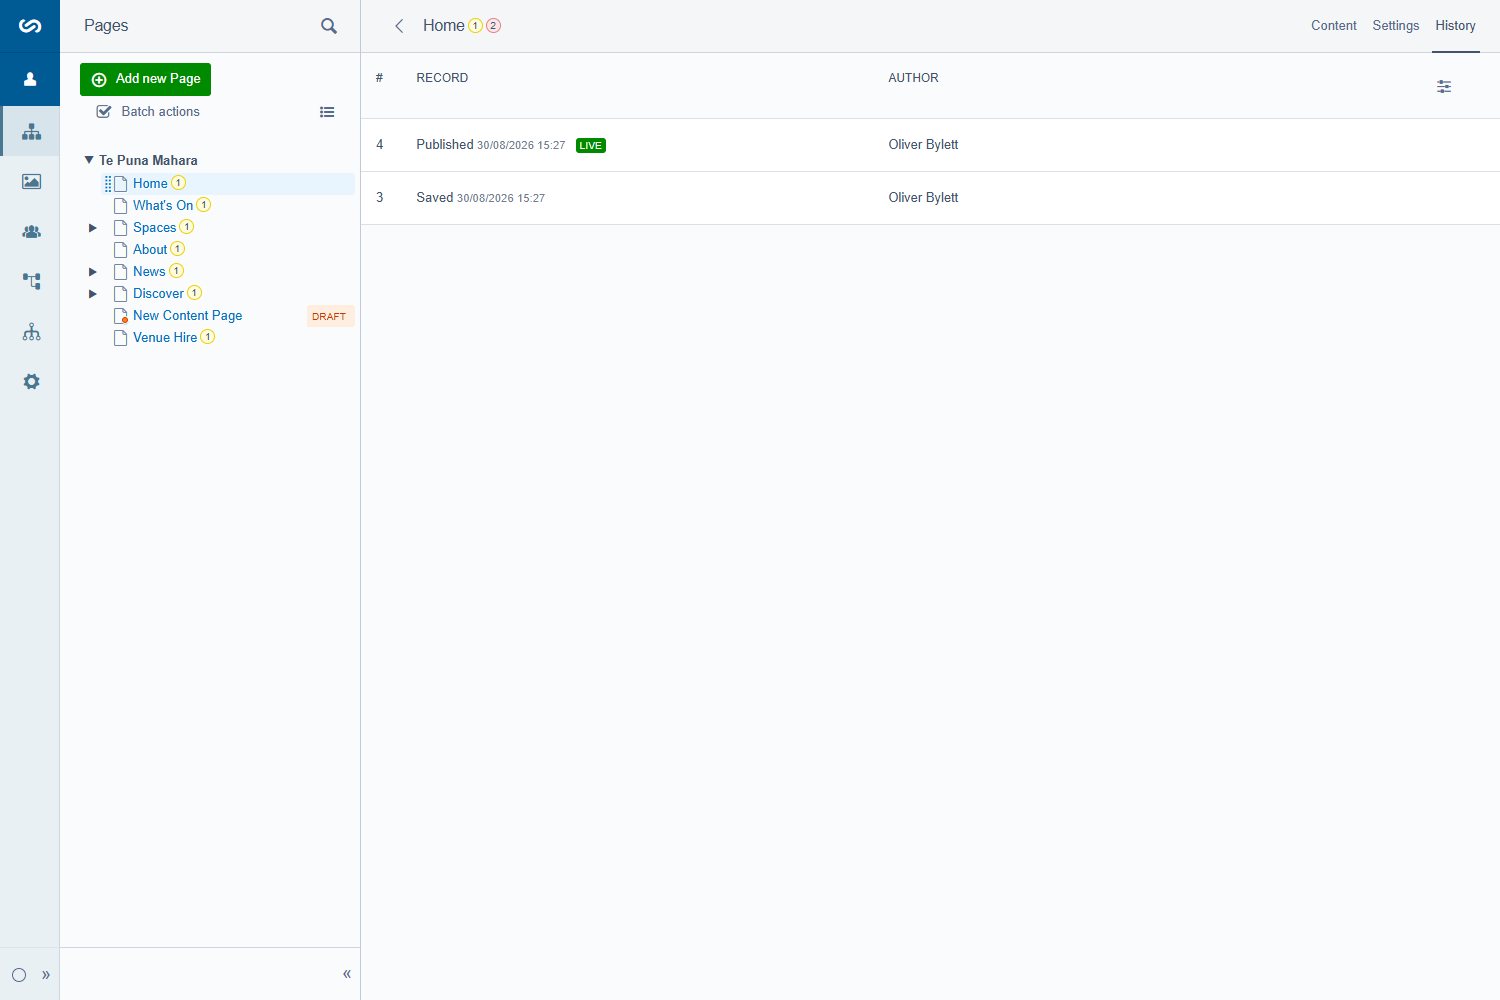
The History tab on every page lists every published version, shows what changed, and lets you roll back. Very little here is unrecoverable.
Section 9
News articles
Articles are pages that live under News. Publish one and it appears automatically at the top of the News page and in the news grid on the home page — you never edit those grids by hand.
- Pages → News → Add new Page → Article Page.
- Fill in the page name (the headline), Category, Excerpt (the summary on cards — one or two sentences), Publish date, Author, Hero image and the Body.
- Publish.
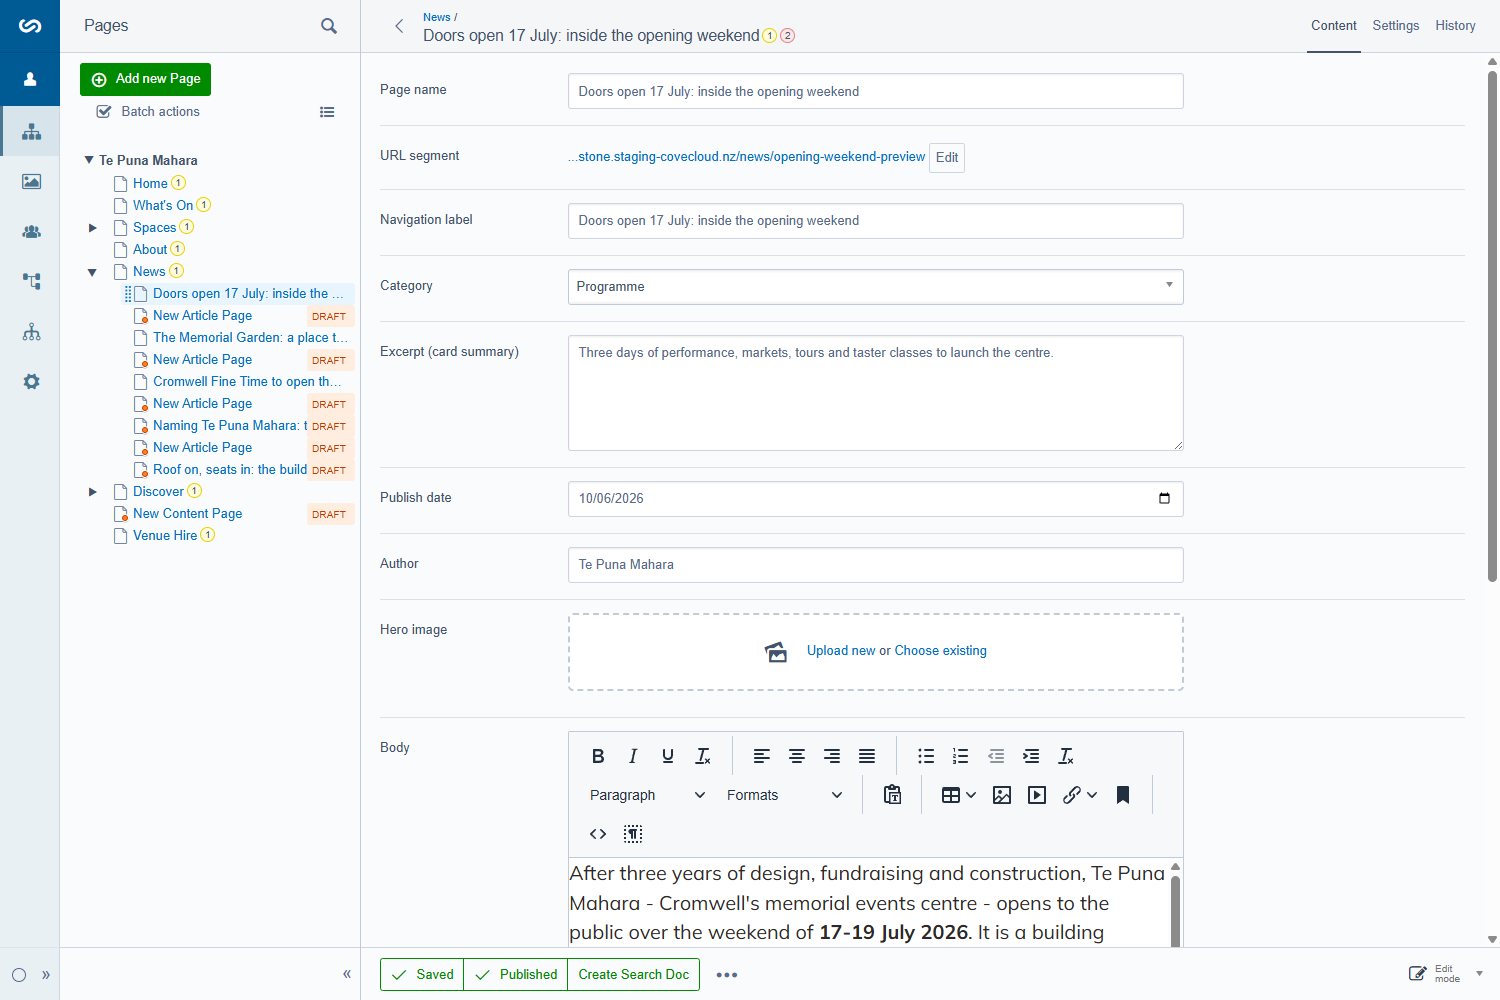
Abandoned drafts sit in the tree marked DRAFT and clutter it up. If a story isn't happening, archive it.
Section 10
Space pages
Each space has its own page, and they feed the Spaces grid and the Venue Hire page automatically. They're the most detailed pages on the site, and the most likely to go stale — capacities, rates and AV lists all change.
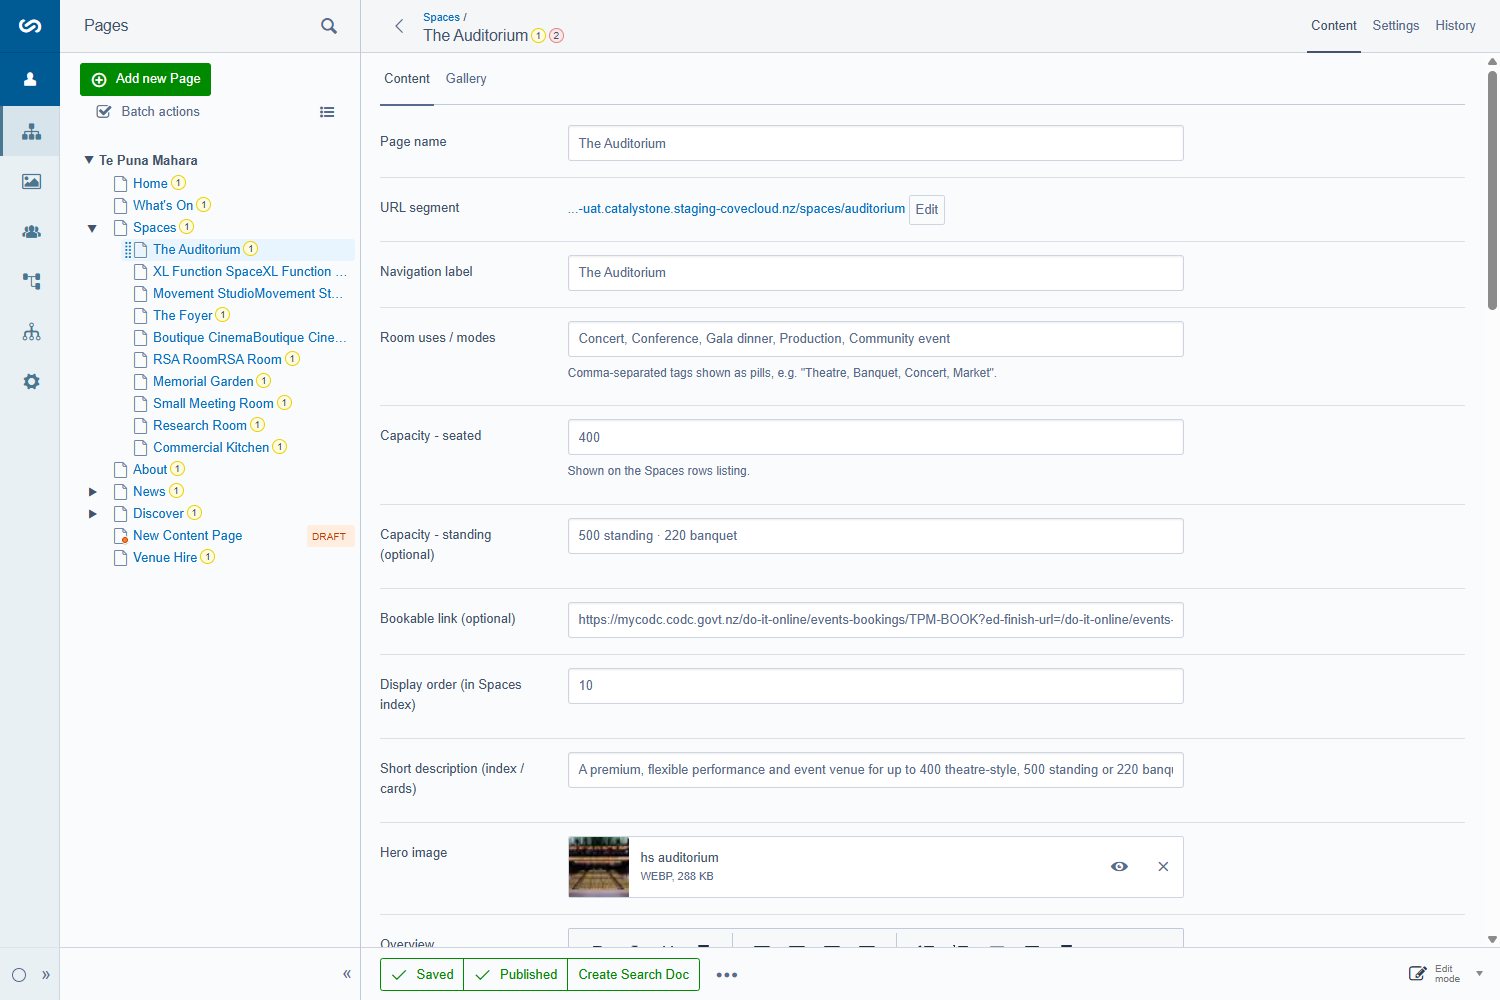
| Field | Notes |
|---|---|
| Room uses / modes | The short tags on the card — "Concerts", "Conferences", "Ceremonies". |
| Capacity | Seated and standing. Keep these matched to the current Venue Hire Guide. |
| Bookable link | The CODC booking address for this space. Every "Book" button uses it. |
| Display order | Position in the Spaces grid. Lower numbers come first. |
| Short description | One sentence, shown on the card in grids. |
| Overview Outline features AV & staging | The body of the page. AV & staging holds the technical tables. |
| Specs | The label-and-value rows under the intro. Add new Spec to add one; drag to reorder. |
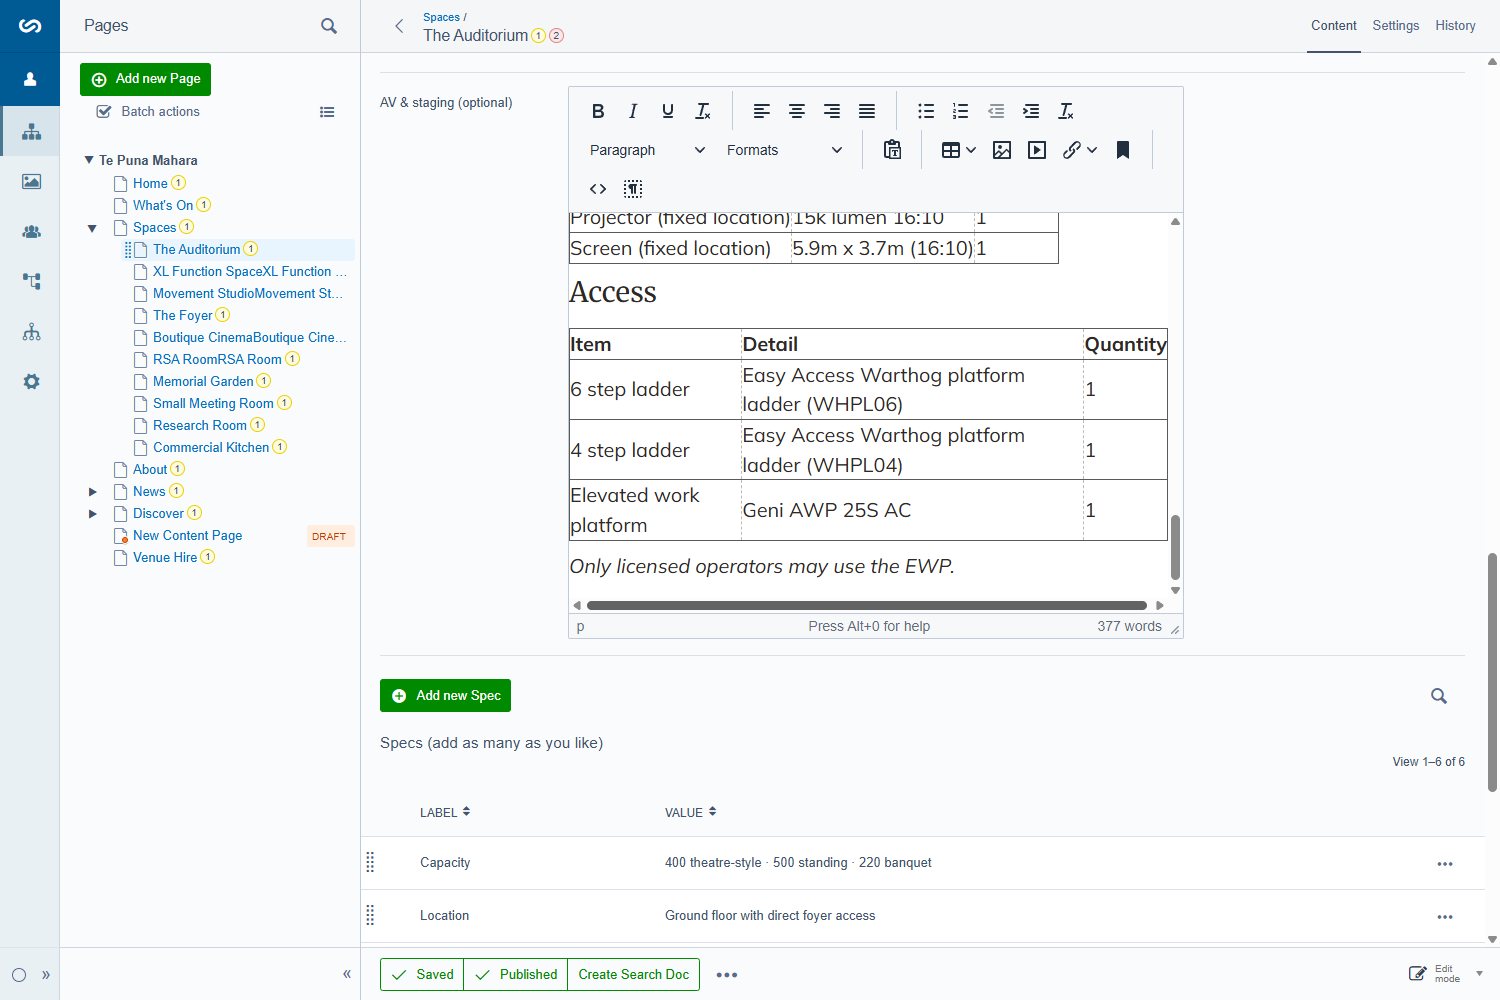
The rate tables on the space pages and the Venue Hire page come straight from the Council's Venue Hire Guide. When a rate changes, update the guide PDF and every rate table. Don't leave the two disagreeing.
Section 11
Events — adding them in Dottie
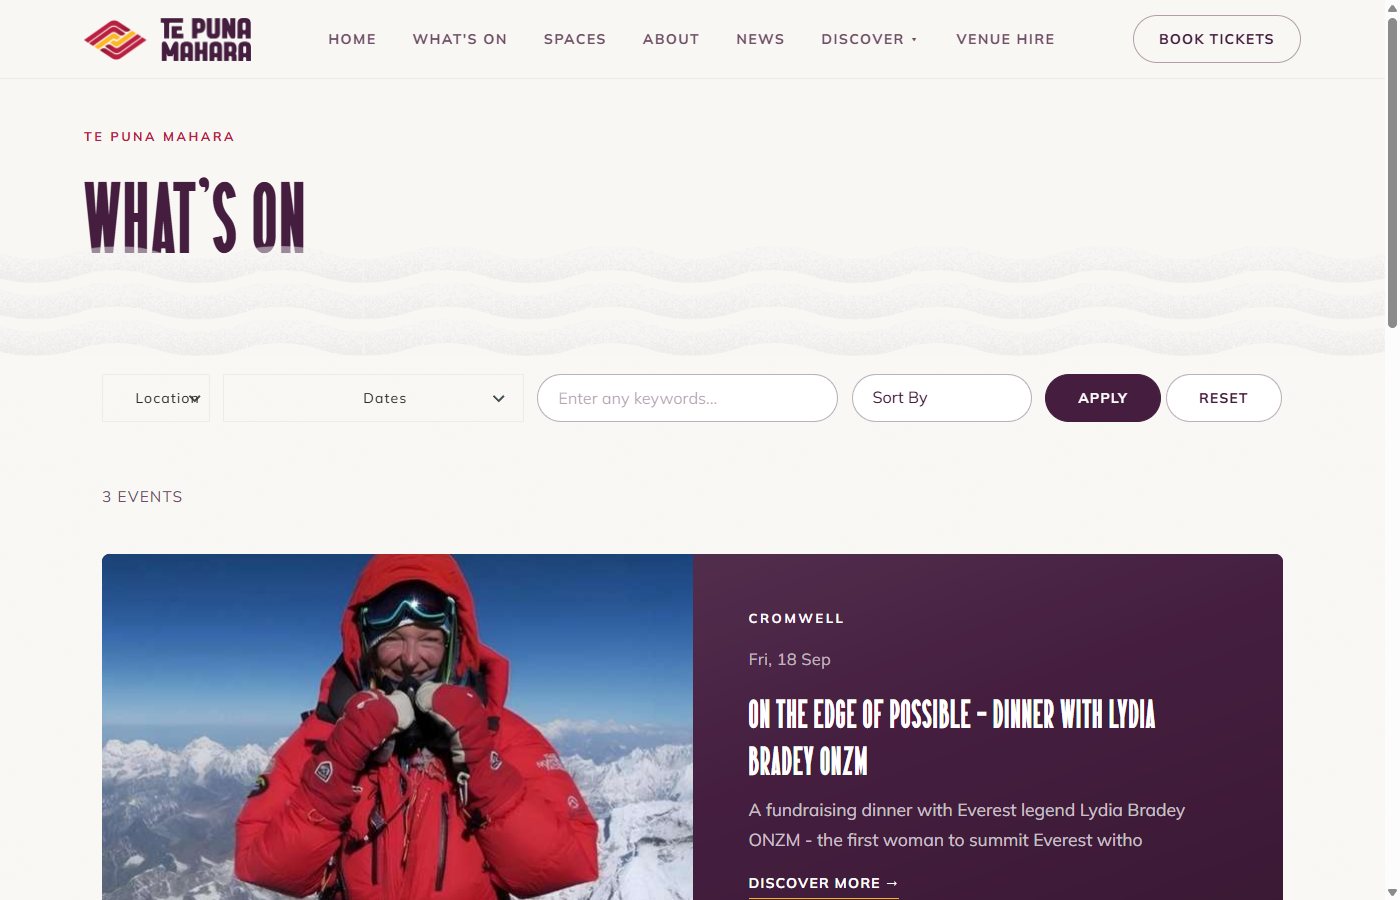
Events don't live in the website CMS. They live in Dottie, the district's listings system, and the website asks Dottie for them every time someone loads a page. Publish an event in Dottie and it's on the website within seconds — on the What's On page, in the home page slider, and with its own event page.
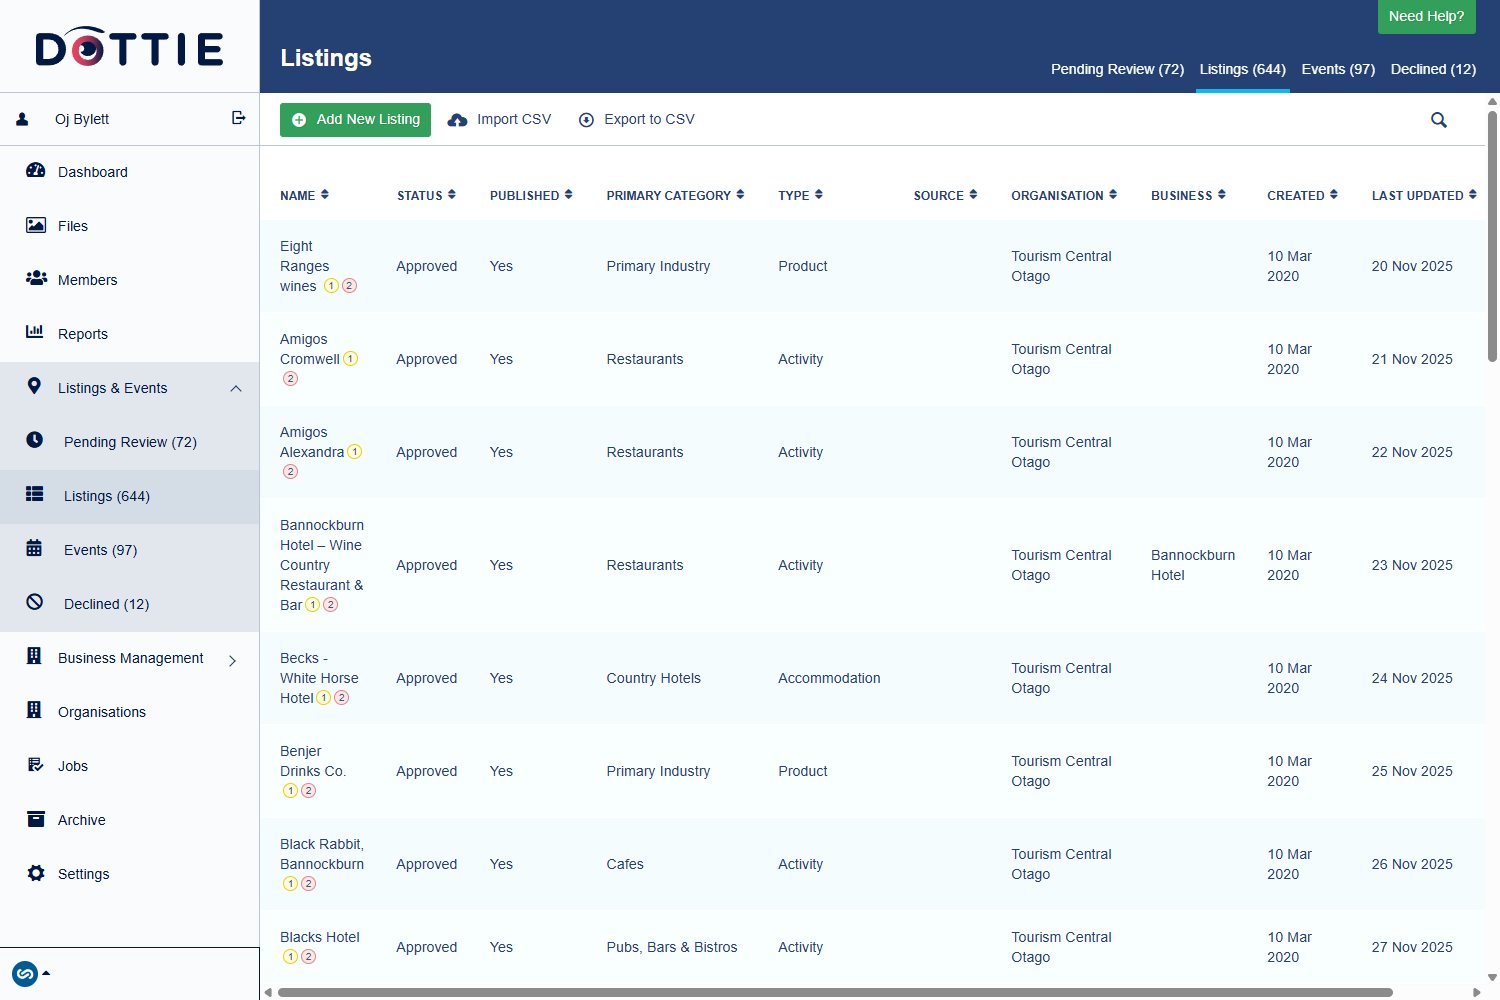
Adding an event
- Events → Add New Event.
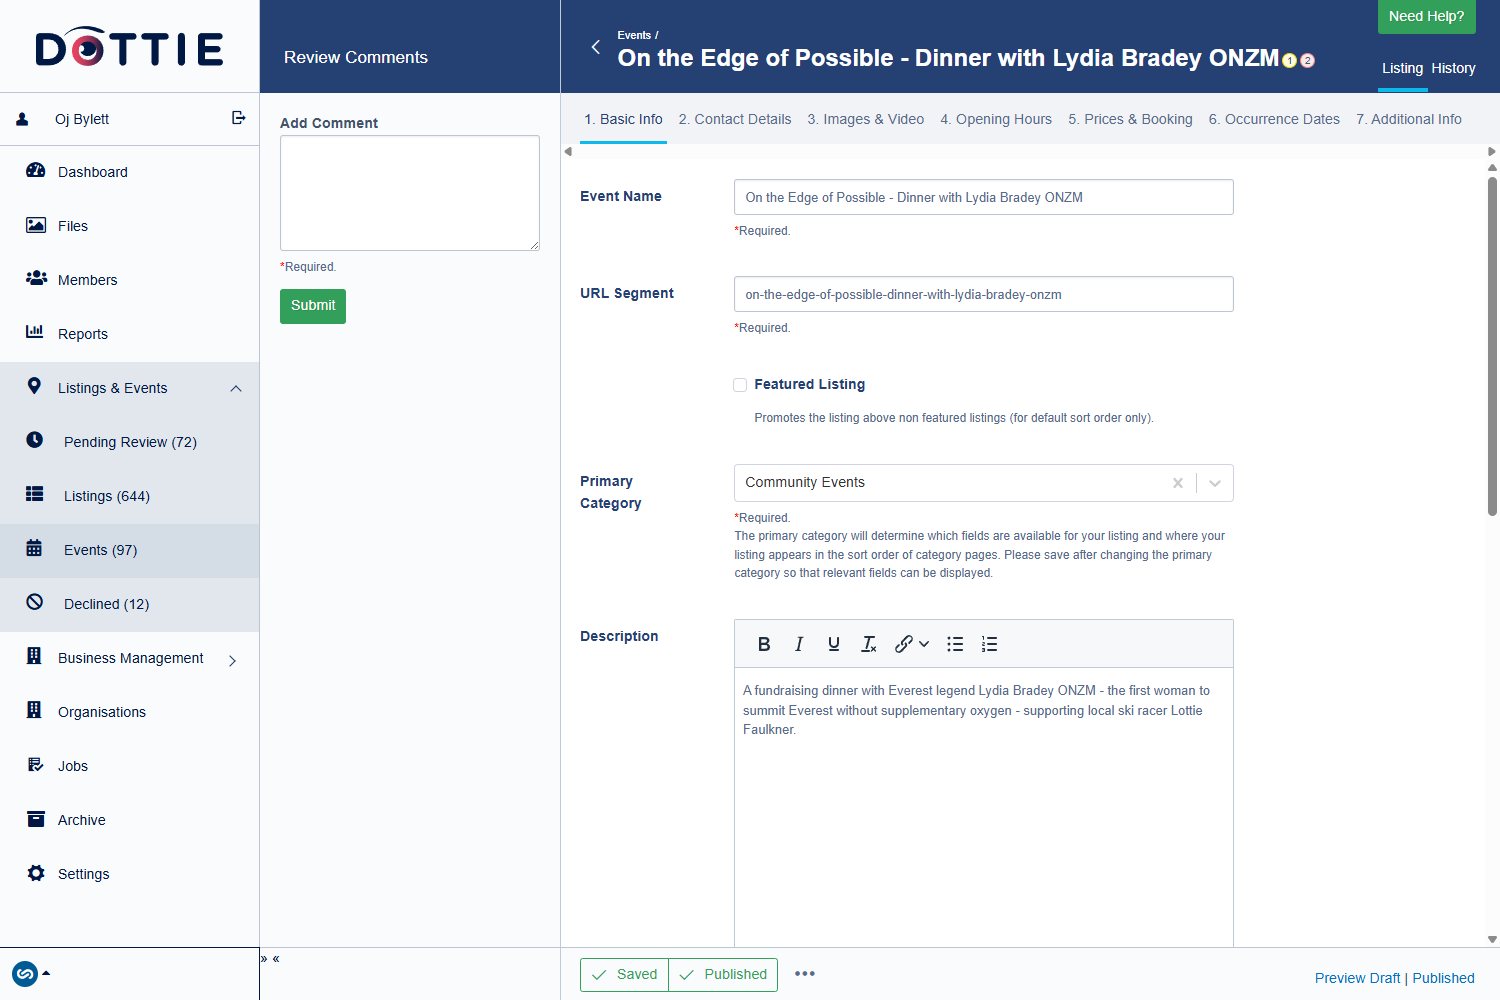
- 1. Basic Info — Event Name, Primary Category (expand Events and pick a specific one, e.g. Community Events), Description, Summary (250 characters, used on cards) and the venue details.
- Still on Basic Info, scroll to Additional Categories and tick Te Puna Mahara. This is what makes the event ours.
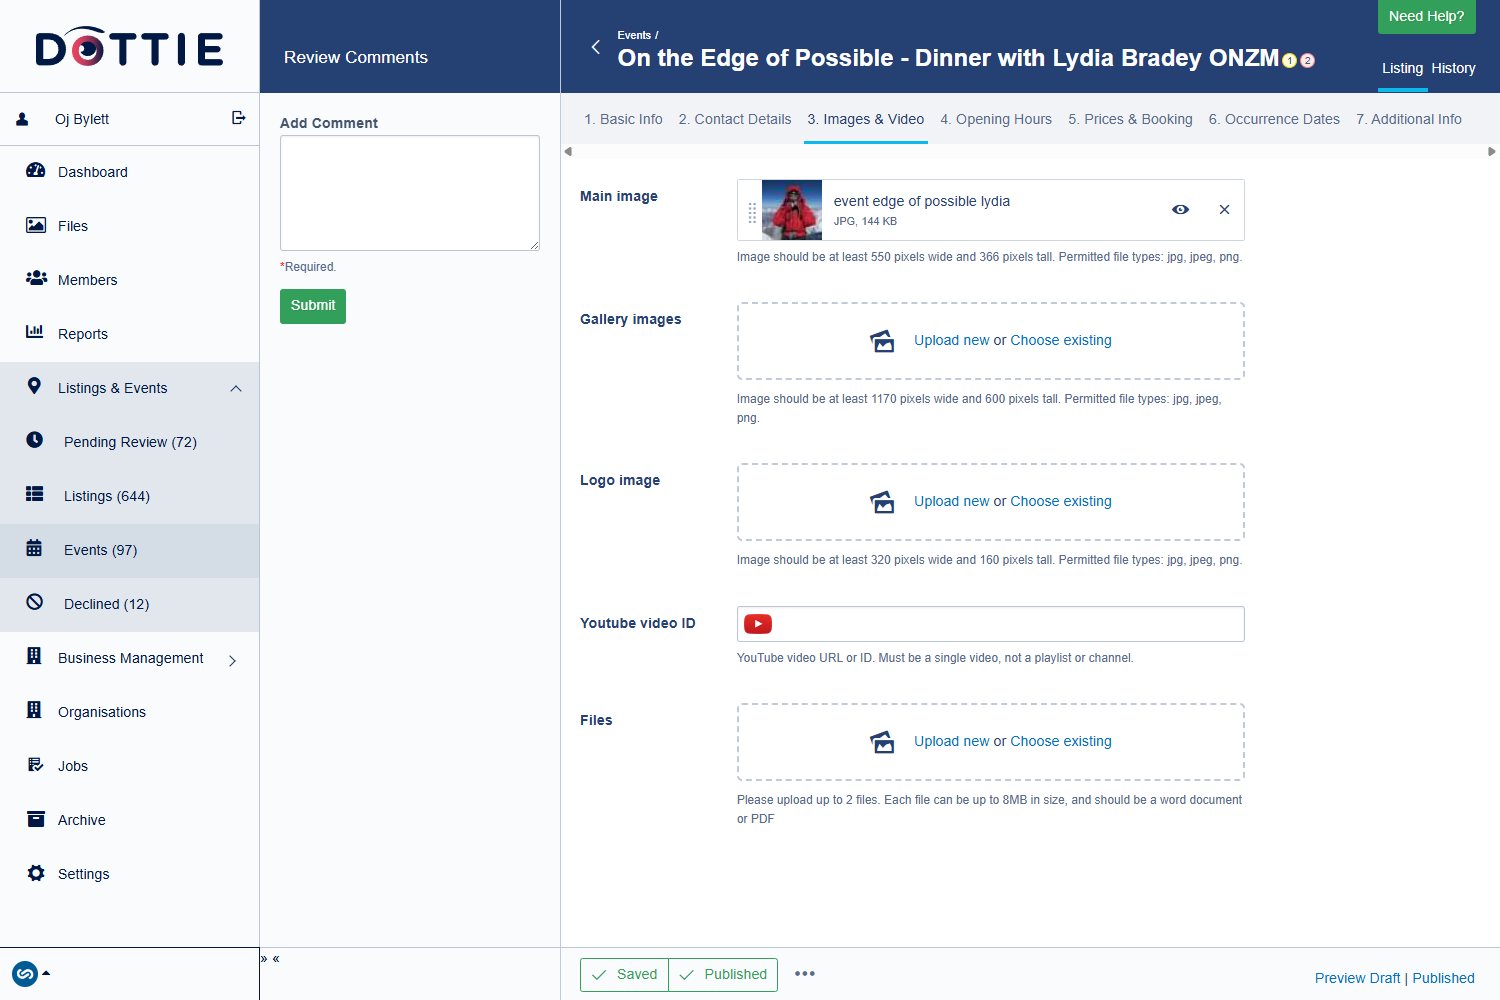
- 3. Images & Video — upload the event image with Upload new. Roughly square, about 1400 px, under 500 KB.
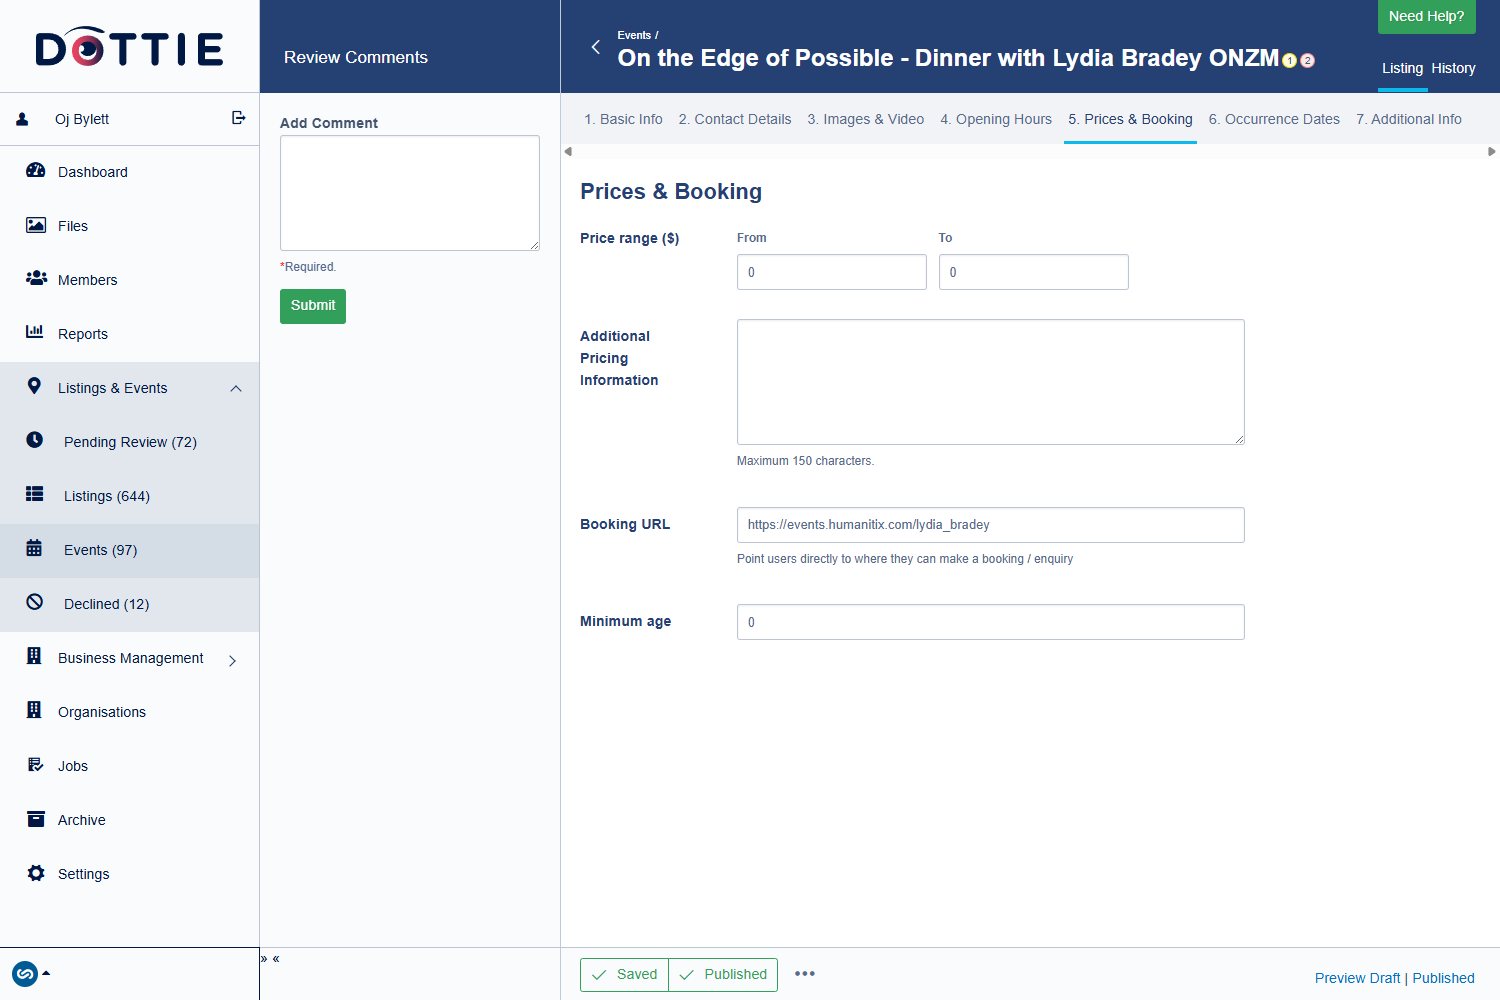
- 5. Prices & Booking — price and the ticketing or booking link.
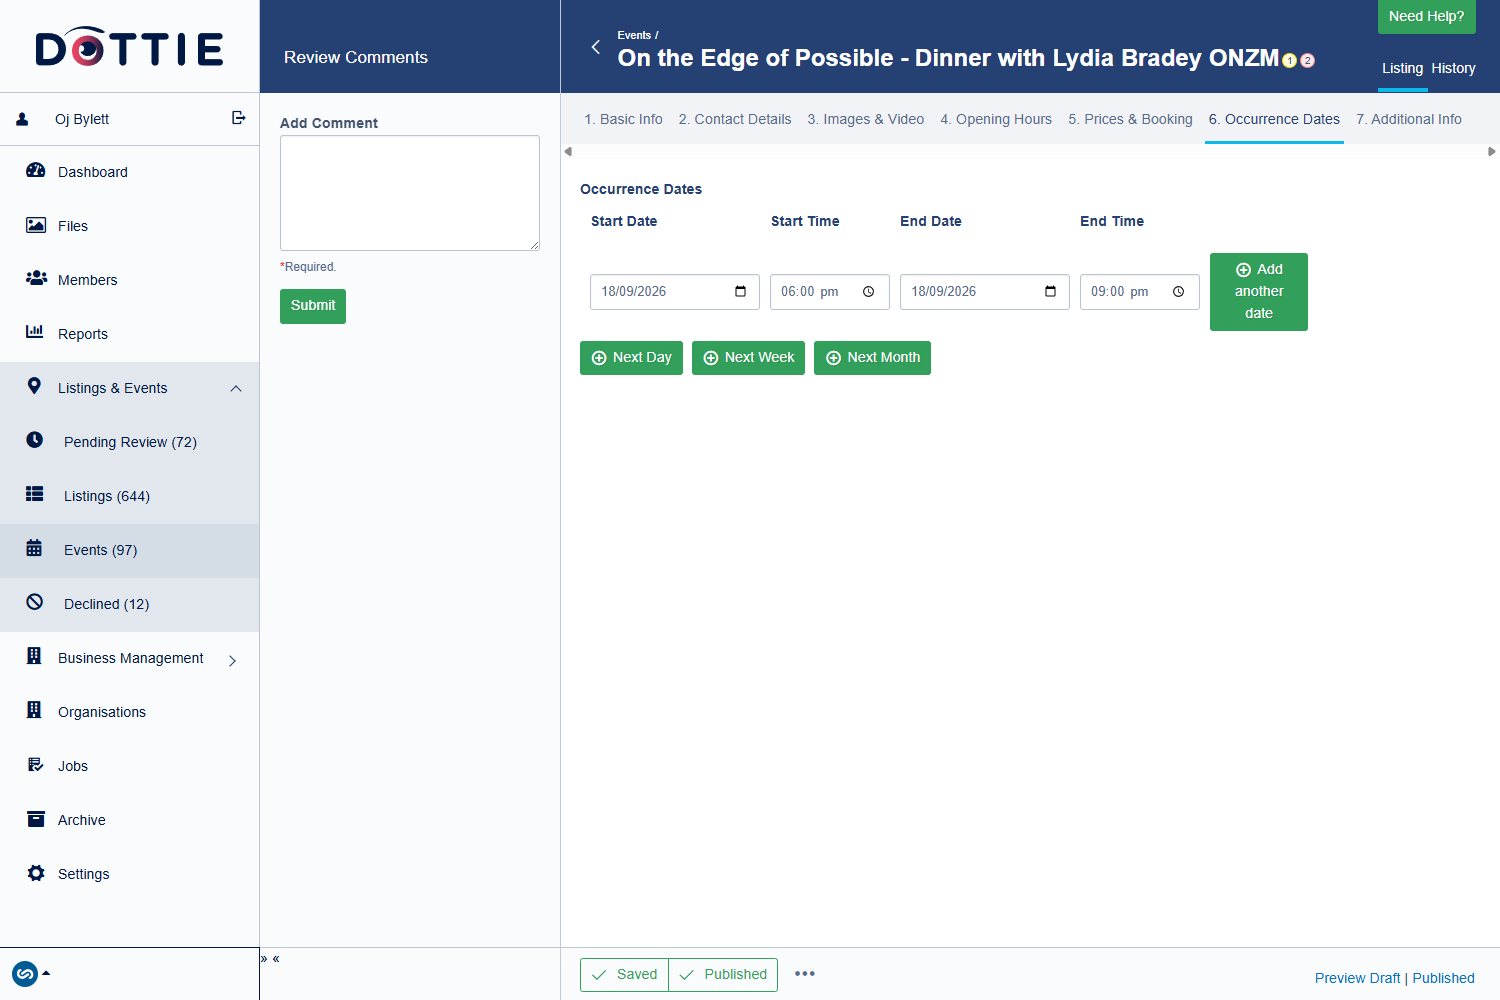
- 6. Occurrence Dates — start and end date and time. Add another date for a run of nights; Next Day / Next Week / Next Month are shortcuts for repeats.
- Click Save & publish. Then publish it a second time — see the warning below.
- Check the What's On page on the website.
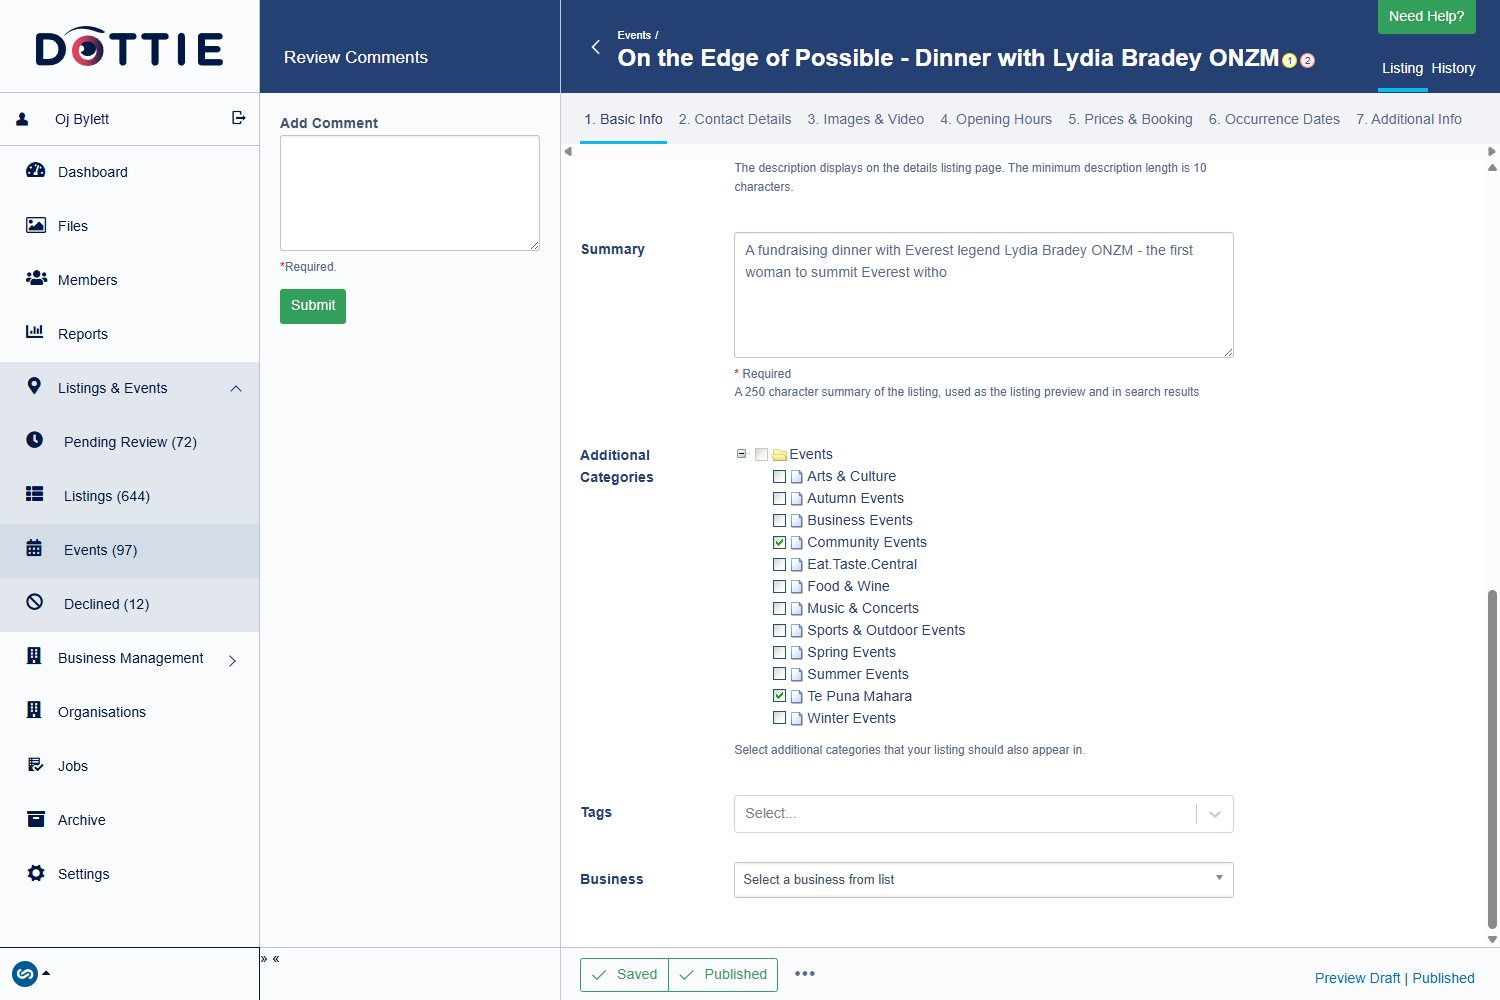
Categories only reach the live feed on the publish after they were ticked. Tick Te Puna Mahara, publish, then publish again. If an event stubbornly won't show up on the website, this is almost always the reason.
Changing or removing an event
- Edit the event in Dottie and publish — the website updates itself.
- Cancelled? Archive it in Dottie. Past events drop off the listing automatically once their dates pass.
- Never try to fix an event by editing the website — there's nothing there to edit.
Section 12
Site-wide settings
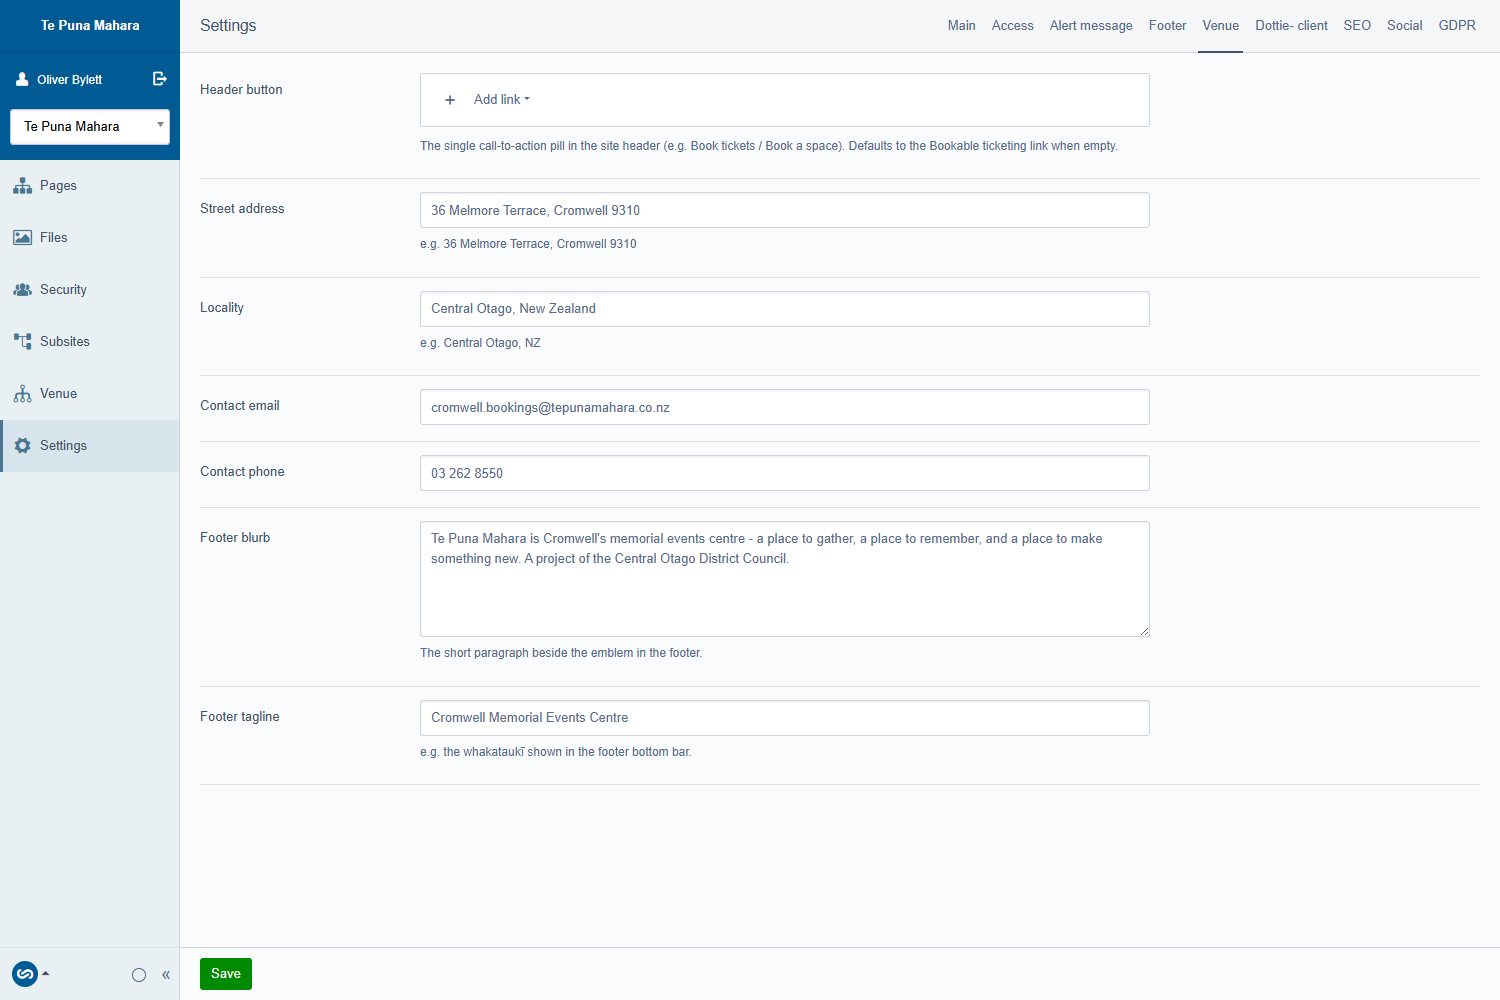
Details that appear on every page live in Settings — the cog at the bottom of the left rail — split across tabs.
| Tab | What's on it |
|---|---|
| Venue | Address, phone, email, footer blurb and tagline, header button. |
| Footer | Footer links and copyright. |
| Alert message | The site-wide notice bar — closures, weather, a cancelled event. Clear it the moment it's out of date. |
| Social | Facebook and Instagram addresses used across the site. |
| Main / SEO | Site title and search settings. Rarely needs touching. |
Click Save at the bottom when you're done — this screen has no Publish button, saving is enough.
The Header button link on the Venue tab doesn't currently save properly, so the header call-to-action falls back to its default. If you need it changed, ask your web contact rather than fighting the field.
Team members
The Venue item in the left rail holds team profiles — name, role, photo, bio — used by a Collection block with Source = Team. Add people there, then add the block to the page you want them on.
Section 13
Everyday recipes
Put up a closure or urgent notice
Settings → Alert message → one clear sentence → Save. Take it down the moment it stops being true.
Change the opening hours
Home page → the Opening hours block → edit the lines → Publish. The café and cinema pages have their own hours blocks; check whether those changed too.
Swap a photo on the home page
Open the block → remove the current image with × → Upload or Choose existing → Insert → Publish the page.
Add an event
Dottie, not the CMS. Section 11 — and remember to tick Te Puna Mahara and publish twice.
Add a page to the main menu
Create it at the top level of the tree and publish it. To make it a dropdown item instead, drag it underneath the parent page. To keep it off the menu entirely, untick Show in menus on the page's Settings tab.
Add a FAQ section
Add an Accordion block, give it a Heading, then add one item per question.
Publish a new Venue Hire Guide
Files → tpm-venue → Upload the new PDF → Publish the file → check the link on the Venue Hire page points at it → update any rate tables that changed.
Take a page down temporarily
Open it and choose Unpublish from the actions menu at the bottom. It stays in the CMS, ready to go back up.
Section 14
Troubleshooting
| What you're seeing | What to do |
|---|---|
| My change isn't on the site | Did you click Publish, not just Save? Then hard-refresh the page (Ctrl+F5). |
| An image shows in the CMS but not live | The file is still a draft. Open it in Files and publish it. |
| A new event isn't showing | Tick Te Puna Mahara in Additional Categories, then publish the event twice. |
| A brand-new page 404s | Publish it, then give it a couple of minutes — the first "page missing" response can be cached briefly. |
| The editor is showing the wrong page | Go back to Pages and click the page in the tree rather than using a bookmarked link. |
| Pasted text looks wrong | Undo, then paste again with Paste as text. |
| You've been logged out mid-edit | Log back in and check the page — anything unsaved is gone. Save often. |
| You deleted something by mistake | Check the page's History tab, or ask your web contact — archived items can be restored. |
Things not to do
- Don't change the URL of a live page — links in emails, posters and Google all break.
- Don't edit anything while the site selector is showing a different Council site.
- Don't paste embed codes from unknown sources into an Embed block. Ask first.
- Don't put important information only inside an accordion — people don't open them.
Section 15
Getting help
Content questions
Wording, photos, what belongs where — your CODC communications contact.
Something's broken
Errors, missing pages, a field that won't save — Catalyst, via the CODC website contact.
Dottie & events
Access, categories, listings that won't appear — the CODC Dottie administrator.
Design & new sections
New page types, layouts or blocks — Remark.
When you report a problem, include the page address, what you clicked, what you expected and what happened instead — plus a screenshot if you can. It saves a round of emails every time.